It’s been a while since my last update. Balancing a full-time job and coding a game is quite the challenge, and honestly, this version caught me off guard with how long it took. It was originally supposed to be just a minor patch with a few bugfixes. However, I ended up implementing several features that took way more time than expected – I’ve poured 128.5 hours into this version alone! Because of that, there isn’t a ton of new playable content this time around. It’s mostly bugfixes, the mythical new outline system (a big visual upgrade!), along with a few neat features and QoL improvements. Let’s run through the main changes.
Outlines!
As I mentioned earlier (and dedicated a post to), around 45 to 50 hours have been spent trying to finally implement a custom outline solution for my game. In the end, there are still some minor bugs, but it kinda works, and I’m personally happy with the result. Outlines can be based on mesh or material color, and they can become transparent, larger, smaller, or enabled per-object, etc.
The three new skills to lift and move objects
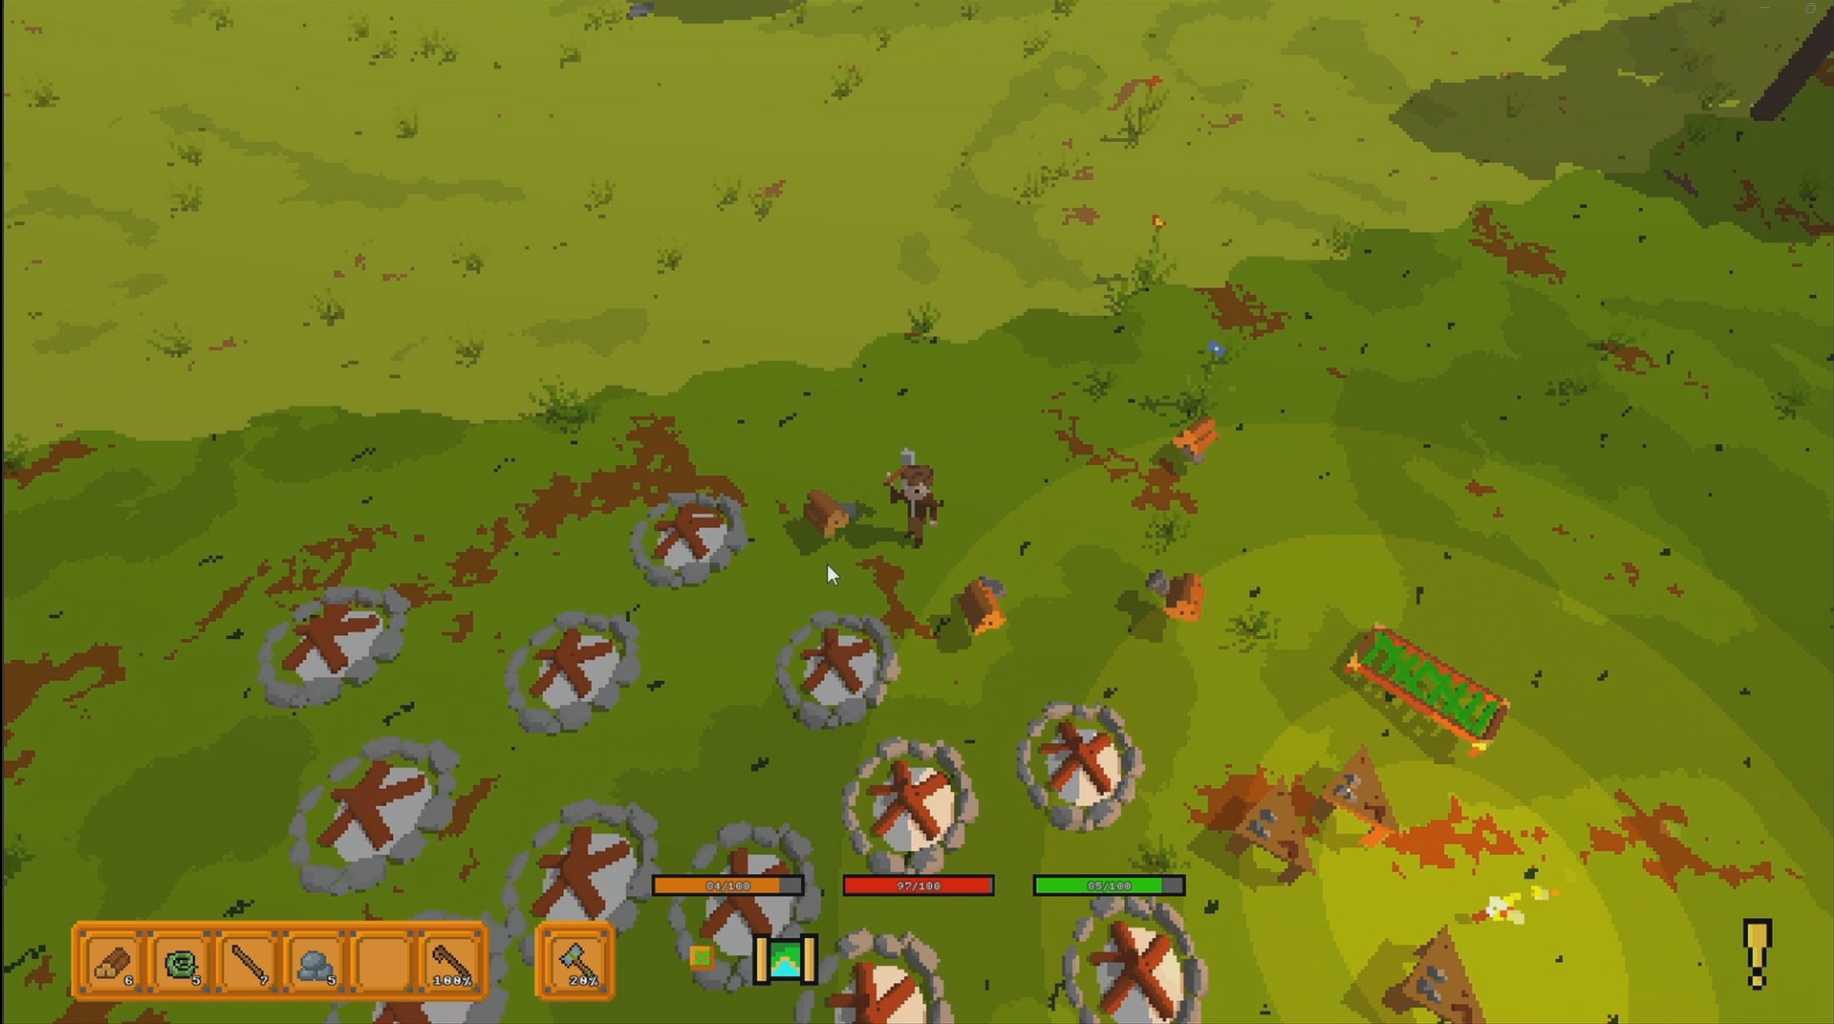
The second largest feature is the “lift and move” skill set! Now almost every placeable object (except for the campfire and placed torches) can be moved via physics interactions. Be careful, though: if you flip objects upside down, you cannot use them! If you flip a crafting table or a crate, you need to flip it back upright before using it. This skill set lets you lift up objects to do exactly that.
In the playground, testing pathfinding for enemies
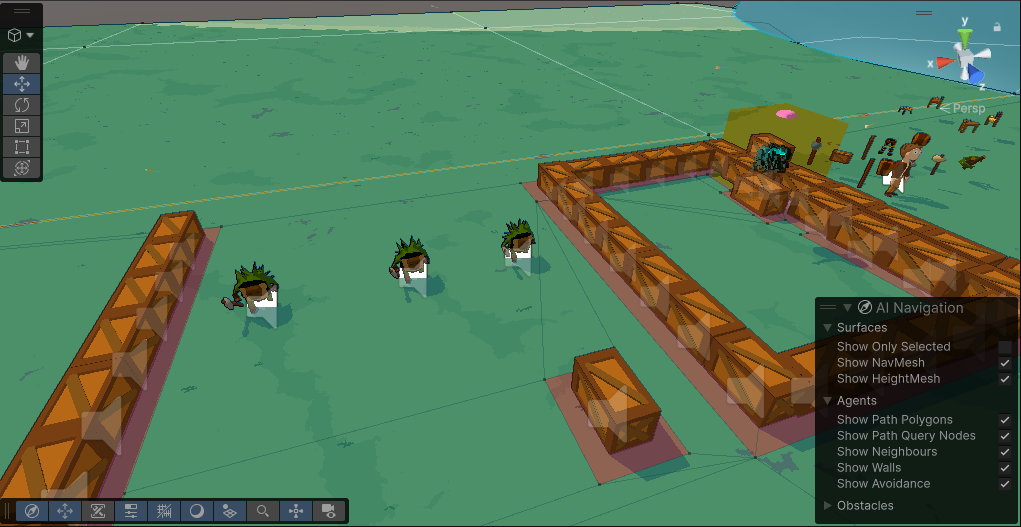
On top of that, almost every placeable object now has a health bar and can be fixed using the new repair kit. And no, you can’t just build a wall of crates to shield yourself anymore! If you try, Goners will actually start attacking and breaking through them. I’ve improved the AI to handle this, which also lays the groundwork for the next major update.
Aside from that, there isn’t a massive amount of new content. However, you’ll notice new damage popups, a red screen vignette when taking damage, an auto-equip feature (Left Alt + Click), and plenty of QoL improvements. You can find all of these, along with the bugfixes, in the full changelog below. I spent a lot of time refactoring many systems, so it will be way faster to add new content.
Don’t forget: this is the final patch before the first majorgameplay update! The next update will introduce new enemies, a dodge-roll skill, varied enemy attack patterns, chests guarded by enemies, and a lot of other exciting features that will finally make the game worthy of its name. Stay tuned, and if you have any questions, feel free to reach out on Discord!
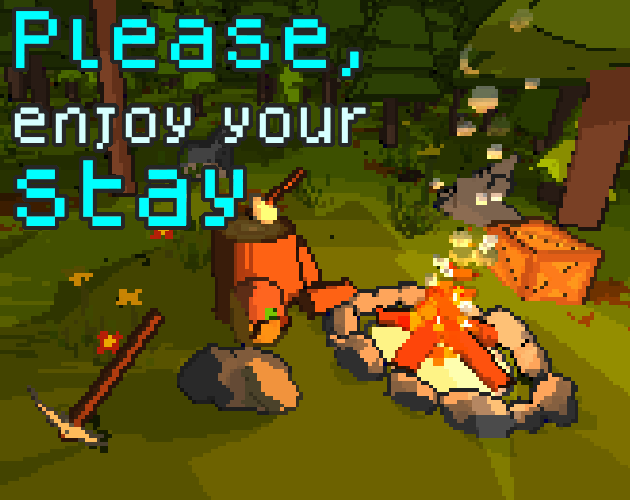
P.S. I’ve also updated the thumbnail for Itch.io! I really like how the new outlines look in it, and I hope it’s a nice step up from the old one. Just keep in mind that it’s still a placeholder until I can afford to commission a real artist. And before anyone asks: no, it’s not AI! It’s just a screenshot of an in-game scene with objects placed directly in front of a pixel-art camera.
Changelogs: [Huge thanks to Hussamisen for the useful advice on features and for discovering many bugs!]
[ADDED]
Outlines! Now almost every object has an outline that makes it easier to spot. If you don’t like it, you can disable or tweak it in the options menu.
Auto-Equip is here! You can now just hold Left Alt and click an item to instantly equip it into the correct slot. No more dragging around!
Added a red damage vignette overlay. You’ll now get a clear visual warning when taking damage, drowning, burning, or starving.
Numbers go up! Added popup damage numbers so you can actually see the damage you’re dealing and receiving in combat.
Added health to almost every object in the game
Added a repair kit.
When holding a repair kit, objects will now show a health bar so you know exactly how damaged they are.
The game now signals when it needs to be updated!
Added a developer console (enable it in the options) packed with commands if you want to mess around or test things.
Brand new custom in-game cursor!
The game now automatically fetches changelogs and update info directly from our servers.
Added some nice audio feedback for dropping, dragging, releasing, and shift-clicking items.
Added many other sound effects (e.g. tools breaking)
Placeable objects can now magically align themselves with the slope of the terrain.
More graphics options! You can now cap your FPS, choose your graphics API (DX11/12/Vulkan), and swap between windowed or fullscreen modes.
New skills to lift up objects and move them around!
The map can now be rotated according to the player’s orientation
[CHANGED]
Goners can no longer attack other goners (sorry, it was too cheesy)
Completely refactored the save system behind the scenes. It’s now much safer and prevents issues with missing or overwritten variables. It’s also way easier to add new saveable items.
Refactored all items. Also easier to add new items and change their type or properties.
Now the game saves while sleeping.
Save files are now safely stored in your OS permanent directory (like AppData). This means you won’t lose your worlds when updating the game to a new version!
Running is now less exhausting: it drains 3 stamina per second instead of 5, and jumping costs 10 instead of 15.
Goners (enemies) got smarter. If you block their path or if they can’t reach you easily, they will now start attacking and destroying the objects in their way.
Increased the Goner spawn chance from 10 to 16. Watch your back.
Increased Hemp spawn by 50%.
Adding a waypoint now places the waypoint by default on the player’s position – unless it’s moved with the mouse.
Instantly updating navmesh when placing or moving an object.
Your walk and run animation speeds now actually scale dynamically with your speed skill level.
Changelogs (yeah – like this one) are fetched from a server so I can easily modify them if I forget something.
Changed how levels are calculated for a smoother transition per level.
Rebalanced all swords and tools. Generally buffed them, especially their broken states.
You can now eat food directly from external inventories, like chests.
If you accidentally release an item while hovering over the UI, it won’t drop on the ground anymore. It just snaps back to its slot.
Reduced the player’s collider width from 0.25 to 0.2 to help you squeeze through tighter spots.
Clicking on a crafting station now automatically opens your inventory with the correct station tab already selected.
Upgraded the engine to Unity 6000.3.0f1 LTS for better performance and stability.
Fallen stations can’t be used anymore until they’re placed upright
[FIXED]
I have no clue when but additional lights didn’t show shadows anymore. Looking at older videos, this bug happened at least on ver v0.0.2, so nobody ever played a version with the additional lights shadows. I haveno idea how I didn’t notice before; it was literally a single line of code to be fixed.
The player icon on the minimap now points in the correct direction when auto-rotate is active.
Gathered dropped items will now automatically go into already existing stacks if there are any, saving space.
Fixed white squares spawning for the first frame in crate slots when opening them.
Fixed a bug where jumping into hemp would block the player in the landing animation.
Removed dropped items from step detection sound (it would cause the system to play different sounds when walking around dropped items)
Fixed particles not spawning when the player spawned and landed
Fixed that annoying bug where you couldn’t drag an object if its UI suddenly closed.
Fixed overlapping and interference issues when multiple different crafting stations were nearby.
Fixed things breaking if you destroyed a Forge of Souls or a repair station while you had its panel open.
Fixed object scale saving incorrectly (it was copying the X-axis for everything).
Fixed the inability to move an item into a filtered slot even when it was a perfectly valid move.
Fixed drag-and-drop acting weird from extra inventories.
Fixed Elise’s mask turning completely white after the engine update.
Fixed the Soul of Wood looking a bit too orange.
Fixed a bug where you could create a new save with an already used name and just load that save.
Dropped berries don’t spin in a massive, weird circle anymore.
Removed the random “(1)” that showed up in the inspect text of some dropped items.
The ground detection logic now properly ignores trigger colliders.
Dead Goners finally have their hitboxes disabled, so their invisible corpses won’t block your path anymore.
Fixed a bug where you would always get the exact same amount of experience (level 1 values) regardless of what you were fighting.
The hammer actually uses its attack speed now.
Typing “WASD” or “QE” while naming a map waypoint no longer moves your character in the background.
Removed that random equip/unequip sound that played every time you loaded a save.
Dropped items and triggers no longer cause incorrect footstep sounds when you walk over them.
Removed the blinding white flash that happened the first time you opened an inventory UI.
Simple storage objects no longer drop all their items twice when destroyed.
Fixed many tools completing their action twice when they broke
The repair station panel no longer stays magically open on your screen when you walk far away.
Fixed a NullReference crash in the entity particle manager when entities were destroyed.
Fixed some dragging issues with placeable object placeholders.
Normalized Goner audio volumes so they aren’t deafening or too quiet.
Normalized many sounds.
Preloaded many sounds so the game doesn’t randomly lag when they’re played for the first time in a session.
Goners no longer use the “goner” navmesh agent, which fixes some of their pathfinding bugs.
Player and enemy blood particles actually play again! And particles last longer, no more blood on the ground.
Goners don’t always sound like they’re walking on rock anymore.
Fixed a weird edge case where the player could get stuck floating in the air.
Placed torches work properly again.
Tools actually function when broken (the fix for the double-hit bug accidentally broke them).
Hit particles are back! They were missing on several objects.
Fixed hit particle colors being completely wrong on most objects.
Tool durability no longer consumes twice right before the tool breaks.
The pickaxe holding animation now starts the moment you equip it.
Fixed falling through the ground if you attacked immediately after shielding with a sword.
Map chunks no longer drag in the opposite direction when moving the minimap with auto-rotate enabled.
You may have noticed my silence over the past month. I fell into the trap of adding “just one more feature” and spent roughly 70 hours tweaking my outline post-processing solution. It might look like an easy problem, but it’s surprisingly complex. If you found this page looking for tutorials, you probably already know exactly what I mean.
There are many ways to implement outlines, each with its own trade-offs. It seems there is no “one-size-fits-all” solution that simply works; every project uses different meshes and has unique requirements. Unity’s sample outline, for instance, is quite basic: it relies heavily on depth detection and physical layers, making it hard to filter specific objects. That approach falls short when you need pixel-perfect precision for a downscaling project, especially with steep angles, or when your layers are already cluttered by a thousand other systems (physics, collision, etc.). Transparent objects are another nightmare. I also tried the inverted hull technique, but making it play nice with a pixel-perfect setup is tough, and it struggles with low-poly meshes where steep edges expand unevenly. After trying several other solutions without success, I gave up and decided to write my own custom shader pass.
Please note that this post does not give you a plug-and-play solution but it’s a walkthrough (with a bit of code) of how my shader work. I might do a simpler ready to use solution later, but it might still require a lot of customization to make it work with your project. You can find most of the code here: https://github.com/Lazy3valuation/PEYSOutlinesCode
Disclaimer: I know many of you hate Generative AI in all its forms, including for coding and translation. For the sake of transparency, I want to let you know that I utilized generative models to help write, debug, and document parts of this code.
Even though I have years of experience as a programmer and have put over 750 hours into this project, Unity always offers new frontiers to explore, and this was new territory for me. The AI was particularly helpful when I started writing the outline shader, helping me navigate potential solutions and avoid dead ends, especially since documentation for Custom Render Passes in Unity 6.3 is hard to come by. It also helped me fix grammatical errors, since English isn’t my first language.
If you don’t agree with using AI, I respect that and I’m sorry to see you go. Hopefully, we’ll meet again on a different topic!
My game without outlinesMy game with outlines
Let’s take a look at how my outlines work, by looking at the features and trade offs/bugs of my solution.
Features:
Full-Screen Pass Architecture: It functions as a full-screen render pass, after a custom render pass.
Works with Transparents. Most tutorials stop at Opaque, but this handles both.
The outline filtering isn’t just based on Layers. Every object that needs an outline has a dedicated component. This allows me to easily filter which objects get an outline without clogging up Unity Layers, which are already used for a hundred other things like physics collisions.
Extra filters for grouping. I can distinguish between objects that are on the same physics Layer and have the outline component by using Rendering Layers.
Each object supports two modes: Material/Texture color (where the outline inherits the object’s color, e.g., to make the edges a darker version of the texture) or a single unique color for the whole object (like the classic flat black).
Per-object outline transparency.
Per-object alpha clipping.
Per-object color and mode.
It achieves pixel-perfect results when combined with my pixel-art post-processing.
Customizable via global settings (e.g., how much depth, normals, or their combination influences the final outcome).
Trade offs:
Very hard to implement, customize, and adapt. Every small change potentially breaks everything. You need deep knowledge to make it work properly. It also requires perfectly tuned settings and two dedicated materials with specific shaders for every outline type that differs from the default static one.
Performance hit. It can handle thousands of objects at once without crashing, which is good for stress tests, but it seems to drop about 10 FPS when active. It’s not very optimized yet and will definitely need optimization in the future.
Thickness is “stepped.” Since it’s pixel-perfect, the line thickness doesn’t grow linearly.
Transparency limitations. It manages to show outlines behind transparent objects (so you see the outline even if you are behind a semi-transparent or fully transparent object), but it causes small imperfections. Also, the outlines disappear completely if viewed behind multiple overlapping transparent objects.
Dithering would be better. In the future, it would probably be better to handle fades with dithering rather than standard transparency.
Stray pixels. There are small black pixels in the outlines that become visible specifically with the pixel-art filter, though you don’t really notice them unless you are looking for them.
Inconsistent direction. It seems undecided on whether to grow inwards or outwards: the behavior seems to change depending on the viewing angle. Luckily it doens’t impact my game.
Let’s start with the visual entry point: the Full Screen Shader Graph. If you look at the image below, it might seem deceptively simple, but that’s because the heavy lifting is hidden inside a custom HLSL include file (OutlinePackage.hlsl).
The main full screen shader
The graph logic is built around three main custom nodes that call into my HLSL package:
Depth Based Detection: This node scans for edges based on the depth buffer, essential for detecting silhouettes and the separation between objects at different distances. It uses a StepDepth parameter to tune sensitivity, and is the same technique used by Unity’s outline sample and many tutorials.
Normal Based Detection (combined with Depth): This first normal node runs in parallel with the depth node, using a specific threshold (StepsNormalsForDepth).
Normal Based Detection (additional details): A second, independent normal node handles the hard edges and surface details using its own step threshold.
The important part is how these signals are combined. I take the output of the Depth node and the first Normal node and pass them through a minimum node. This acts as a “strict filter”, essentially saying that for a depth edge to be valid in this specific context, it must agree with this specific normal threshold (or vice versa), which helps eliminate noise and false positives. This, for example, removes false positives when objects were far away and turned full black (outlined), or when they were seen at a steep angle with the camera (e.g. when the camera was close to the terrain, like in the Menu, it became full black -outlined-).
Finally, I take that filtered result and add the output of the second, pure normal based node. This ensures that sharp internal edges (like 90-degree corners on a building) are always drawn on top. The result is then split: the RGB goes to the “Base Color”, and the alpha is isolated via a swizzle node to drive the final transparency of whatever is not an outline.
Now, let’s move to the hot sauce. The OutlinePackage.hlsl file contains the logic that actually decides “is this pixel an edge?”.
It’s important to note that before doing any sampling, I use a helper function called GetSnappedUV. Since I’m aiming for a pixel-perfect look, I can’t just sample textures arbitrarily. This function snaps the UV coordinates to the nearest pixel center relative to the screen resolution. This prevents sub-pixel jittering and ensures that my “thick” lines align perfectly with the screen grid, rather than looking like a blurry antialiased mess. You might want to modify that code if you don’t need pixel perfect outlines.
Normal-Based Detection:
/** * INTERNAL LOGIC: Normal-based Edge Detection. * Samples neighbor pixels to find discontinuities in surface normals. */float4NormalBased_Internal(float2 screenUV, float thickness, float step_val,TEXTURE2D_PARAM(depthTex, depthSampler),TEXTURE2D_PARAM(normTex, normSampler),TEXTURE2D_PARAM(colorTex, colorSampler)) {float2 centerUV = GetSnappedUV(screenUV, float2(0, 0), 0);float3 nC = SAMPLE_TEXTURE2D(normTex, normSampler, centerUV).rgb;float centerRawDepth = SAMPLE_TEXTURE2D(depthTex, depthSampler, centerUV).r;float closestDepth = centerRawDepth;float4 closestColor = SAMPLE_TEXTURE2D(colorTex, colorSampler, centerUV);// Fallback to Scene Normals if the custom buffer is empty/invalidif (length(nC) < 0.01) nC = SampleSceneNormals(centerUV);float totalDiff = 0.0;// Neighbor directions: Top, Right, Bottom, Leftfloat2 dirs[4] = {float2(0, 1),float2(1, 0),float2(0, -1),float2(-1, 0) };for (int i = 0; i < 4; i++) {float2 neighborUV = GetSnappedUV(screenUV, dirs[i], thickness);float3 nN = SAMPLE_TEXTURE2D(normTex, normSampler, neighborUV).rgb;float neighborRawDepth = SAMPLE_TEXTURE2D(depthTex, depthSampler, neighborUV).r;// Track the closest depth to ensure the outline color belongs to the foremost objectfloat oldClosest = closestDepth; closestDepth = GetCloserDepth(closestDepth, neighborRawDepth);if (closestDepth != oldClosest) { closestColor = SAMPLE_TEXTURE2D(colorTex, colorSampler, neighborUV); }if (length(nN) < 0.01) nN = SampleSceneNormals(neighborUV);// Accumulate difference between center normal and neighbor normal totalDiff += distance(nC, nN); }// Smoothstep filters the accumulated difference into a crisp linefloat outlineStrength = smoothstep(step_val, step_val + 0.01, totalDiff) * GetOcclusionMask(centerUV, closestDepth);returnfloat4(closestColor.rgb, closestColor.a * outlineStrength);}
HLSL
This function detects edges by looking for sudden changes in surface direction.
Edge Calculation: It accumulates the distance between the center normal and neighbor normals. The result is filtered through a smoothstep to create a crisp line.
The Sampling Loop: It samples the central pixel and its four immediate neighbors (Top, Right, Bottom, Left).
The “Color Stealing” Trick: One specific issue with outlines is deciding which color the outline should be. If I have a red object in front of a blue object, the edge pixel is technically on the blue object’s background, but I want the outline to be red (belonging to the foreground). The code tracks the closesdepth among the neighbors. If a neighbor is closer to the camera than the center pixel, I swap the closestColor to that neighbor’s color. This ensures the outline always inherits the properties of the foreground object.
Depth detection is trickier because “distance” is relative. A 1-meter gap is huge if it’s right in front of your face, but invisible if it’s 1km away.
To solve the distance issue, I calculate the difference between neighbors relative to the camera distance: abs(dC – dN) / (dC + 0.001).
Adaptive Thresholding: A common bug in depth outlines is “striping” on floors or walls that are at a steep angle to the camera. The depth changes rapidly across the surface even though it’s flat. To fix this, I calculate NdotV (the dot product of the view normal).
If the surface is facing the camera, the threshold remains low (sensitive).
If the surface is slanted (grazing angle), I increase the threshold dynamically. This “Adaptive Thresholding” prevents the shader from drawing false outlines across flat but tilted surfaces.
Both functions finally pass their result through GetOcclusionMask, which compares the custom depth against the actual Scene Depth. This ensures that if an outline is physically blocked by a wall in the main scene, it gets properly occluded.
Now, you’re probably wondering: “Why aren’t we using the standard scene depth and normal buffers directly in the shader graph? Why go through the trouble of generating 4 global textures?”
The answer comes down to control, specifically regarding Transparent objects.
Standard scene normals and depth are great for global effects, but they are “all or nothing.” You can’t easily filter out specific objects (like excluding a particle system or a specific UI element) without fighting the rendering pipeline. More importantly, transparent objects usually don’t write to the standard depth/normal buffers in the way an outline shader needs. If you rely on the global scene depth, your outlines will often glitch or disappear entirely when dealing with semi-transparent meshes.
To solve this, I implemented a Custom Render Pass (OutlineDataCaptureFeature). Instead of relying on what Unity gives us by default, we explicitly tell the renderer to “redraw” our outlineable objects into off-screen textures using specific override materials:
Normals Pass: Renders the object geometry using a material that outputs world-space normals, written in a global texture.
Color/Data Pass: Renders the object using a material that encodes the outline color (or the object’s texture color) and other data, written in the second global texture.
This gives us full control. We know exactly what is in those textures.
If we simply rendered all our objects into one “depth/normal” buffer, we would hit a wall as soon as we tried to fade an object out. Imagine a character standing behind a tree, like in my game. Both have outlines. If the tree starts to fade out (becoming transparent) to reveal the character, its values in the depth buffer would still be “solid.” The shader would think the tree is still blocking the view, and the character’s outline would remain hidden until the wall completely vanishes.
To fix this, we split our data into two distinct “channels” (sets of textures), effectively creating the 4 global textures mentioned earlier (normals A, color A, normals B, color B):
Buffer A (solid): Contains all fully opaque objects.
Buffer B (transition): Reserved for objects that are currently fading or transparent.
By separating them, the shader can compare the depth of the Solid object against the transition object. If the Transition object is in front, the shader can “look through” it (applying an alpha fade) to draw the outline of the solid object behind it. This solution is everything but perfect: if you are behind two or more transparent objects, the buffer breaks and outlines are not drawn for objects behind them. Moreover, I noticed that when an object becomes transparent, its outlines become darker, as if the outlines are rendered twice. In the future I’ll consider to fix those bugs.
Both the full screen pass and the custom render pass fully set
To fill those four specific textures, I wrote a Custom Renderer Feature called OutlineDataCaptureFeature. The core responsibility of this feature is to function as a strict gatekeeper. It doesn’t just “render everything with a different material.” It specifically hunts for objects based on a combination of their components (if they have the OutlineableObject component), standard GameObject Layer and, more importantly, their Rendering Layer Mask.
Here is how the logic flows inside the RecordRenderGraph method:
Texture Allocation: First, we define our render targets. We need high-precision formats (ARGBHalf) for normals to avoid banding artifacts, while standard ARGB32 is sufficient for the color data.
The Four Passes: The feature executes four distinct “Raster Render Passes.” This is where the separation happens.
Pass 1 & 2 (solid buffer): These passes iterate through my object list but explicitly target rendering layer 20, which is the default for the solid objects. It draws them once for normals/depth and again for color.
Pass 3 & 4 (transition buffer): These passes do the exact same thing but target Rendering Layer 30. Layer 30 is reserved for the objects that needs to be rendered “in front of other outlines”, so the objects that are semi-transparent or transparent.
The magic command here is overrideMaterial inside the RendererListDesc. This tells the render pipeline: “Ignore whatever shader this object usually wears. For this specific pass, use this specific utility material.” This is how we convert a complex character with albedo, roughness, and metallic maps into a flat, data-rich silhouette that our HLSL shader can easily read.
This step is crucial. You need to create two different materials, each handling a specific aspect of the outline data. The first material of the override group defines the normals. If the object is static (or animated by a standard Animator), the output shader should look like this:
The simplest static normal shader
It’s very easy. The Normal Vector node (set to World Space) is directly linked to the output and will populate the texture.
But what happens if you have an object with vertex animation via shader graph, like water or trees swaying in the wind? You need to create a specific shader variant for those objects. For example, this is the vertex displacement used to animate my trees:
A more complex normal shader (used in my case to animate trees with wind)
You can actually ignore all those fancy nodes. All of them calculate the displacement of the tree’s vertices and are an exact copy of the nodes found in the original Tree shader. It’s imperative to configure your URP Renderer Data correctly. You need to add two features:
Add a standard Full Screen Pass Renderer Feature (assigning the material created with the Full Screen Shader Graph) and set it to After Rendering Post Processing.
Add my OutlineDataCaptureFeature and set the injection point to Before Rendering Transparents.
Now, let’s look at the color material. The first shader we’ll see is the one used for static objects. The default setting doesn’t use alpha clipping, so the outlines can range from transparent to semi-transparent (or fully opaque) using the Alpha output node.
An online color shader
Since my game uses toon shading with light ramps and custom code, I created a subshader graph to hold all my lighting and color logic. For now, just take a look at how the alpha of the _OutlineColor goes to the “Alpha” fragment. This means that whatever alpha the outline color property has, it controls the outline transparency.
The subshader is big and most of the nodes are customized for my toon solution, so I’ll split the explanation in two and focus only on the important parts.
Lighting part of the color outline subgraph
This is the Lighting Group, which you can ignore. If you don’t have any custom lighting in your game, you can just use a “Lit” shader and/or use the Main Light and other light sources in your shader graph. If you’re using only a full black outline, you can completely skip this part. It’s mostly needed to link the outline color to the lights so that, for example, a white outline becomes darker (until it becomes full black) when the main light dims, simulating night. Otherwise, outlines would keep their color regardless of the lighting conditions.
The core of the color outline shader
Below the lighting group, we find three other groups: the Fog group (which you can again ignore if you don’t need an outline that scales with environment color), the Merging section where everything is linked up, and the most important part: the “Outline settings” group.
The outline settings group implements all the logic to customize the desired color. There are three main modes:
Static Color: A simple color for the whole outline. The most common approach (e.g., flat black, or red/orange to highlight selected objects).
Material Color: Very useful for low-poly objects; the outline follows the color of the mesh’s material. It automatically supports multiple materials for one mesh, but you must add the OutlineableObject component to every object.
Texture Color: Same as the material color, but uses a texture map. You use this when the object’s material has a texture rather than a flat color.
You can see how for options 2 and 3, the material/texture color is multiplied by the outline color property. That’s because if you didn’t, outlines would have the exact same color as the edges, and you wouldn’t even notice them. My personal choice is to use the material/texture option combined with a light gray outline color: this makes the outline of the object a darker version of itself, as seen in the example below.
If you need alpha clipping instead of uniform transparency, you can enable that and set up the clipping according to the same logic used in the main object shader. Here is an example I use for the player spawn animation:
An example of alpha clipping color shader, used for my playerAlpha clipping with both the player’s mesh and outline.
Finally, the settings of the Custom Render Feature will look something like this:
Example of the content of the capture gropus
The “Layers” define which target objects the custom pass will attempt to outline. After filtering by layer, it checks if the objects have the OutlineableComponent. If they do, it checks which Rendering Layer they are assigned to, and if they match the pass criteria, their outlines are rendered accordingly.
It is imperative to set the OutlineDataCaptureFeature injection point to Before Rendering Transparents and the Full Screen Pass to After Rendering Post Processing.
Let’s jump to the final main component: the OutlineableObject.cs, which I’m not pasting here for simplicity but you can find it in the GitHub repo I’ve linked above.
So we have the Shader that draws the lines, and the Render Feature that captures the data. But how does an object tell the system: “Hey, I want an outline, and I want it to be Red” or “I am currently transparent, please render me in the Transition buffer”?
This is handled by the OutlineableObject.cs component that must be attached to every mesh you want to outline. It acts as the bridge between the GameObjects in your scene and the rendering pipeline.
Remember how the Render Feature looks specifically for objects in Rendering Layer 20 (Solid) or 30 (Transition)? This component is responsible for assigning those bits. When the game starts (or when you change settings in the inspector), the script ensures the MeshRenderer has the correct bit set in its renderingLayerMask. If an object needs to fade out, my transparency system (not shown here) simply toggles the bit from 20 (or whatever the object target is) to 30, and the Render Feature automatically moves it to the correct buffer in the next frame.
The most interesting part of this script is how it handles colors. Since the render feature overrides the material with a generic data material, we lose access to the original object’s properties (like its main texture or color). To solve this without creating thousands of material instances (which would kill performance), I use a MaterialPropertyBlock.
The script runs a logic loop that pushes data directly to the GPU for that specific renderer:
Static Color Mode: It simply passes the outlineColor chosen in the Inspector.
Dynamic/Texture Mode: It searches the original material for a main texture (checking for standard properties like _BaseMap, _MainTex, etc.) and “bakes” it into a variable. It then passes this texture to the Render Feature via the property block.
Important: If you want to use the texture color, it is crucial that your shader uses standard naming conventions for the texture property (e.g., _BaseMap or _MainTex). If your shader uses custom names, you have two options: either add those names directly into the search list in the code, or manually drag and drop the texture into the “Baked Texture” slot in the inspector of the OutlineableObject.
Here is a snippet of how it “bakes” the texture to ensure the outline matches the object’s visual pattern:
private voidFindAndBakeTexture(){if (Renderer == null || Renderer.sharedMaterial == null) return; Material mat = Renderer.sharedMaterial; Shader shader = mat.shader;// Automatically find the first texture property in the shader// to use as the source for the outline colorint count = shader.GetPropertyCount();for (int i = 0; i < count; i++) {if (shader.GetPropertyType(i) == ShaderPropertyType.Texture) { Texture foundTex = mat.GetTexture(shader.GetPropertyName(i));if (foundTex != null) { bakedTexture = foundTex;return; } } }}
HLSL
By using SetPropertyBlock, we can have hundreds of objects with completely different outline colors or textures, all processed by the same single Render Feature pass.
Handling Transparency: The “Layer Switch”
Now, how do we automate the movement of objects between Buffer A (solid, layer 20 or other custom layers) and Buffer B (transition, layer 30)? We can’t expect the Render Feature to guess when an object is transparent; we have to tell it explicitly.
In my game, I have a camera system that detects obstructions (trees, walls, etc.) between the camera and the player. When an object needs to fade out, I don’t just lower the alpha on its material; I also communicate with the OutlineableObject component to switch its Rendering Layer.
Here is a simplified example of the logic running in my Camera Controller that I use to turn the trees transparent:
// Inside the Camera/Obstruction logic loopif (objectIsObstructing){// 1. Fade the object normally currentAlpha -= Time.deltaTime * speed; meshRenderer.material.SetFloat("_Alpha", currentAlpha);// 2. Move Outline to Transition Buffer (Layer 30) & Sync Alpha outlineObject.SetTransitionState(true); outlineObject.UpdateObstructionFade(currentAlpha);}else{// Object is visible again: Return to Solid Buffer (Layer 20)if (currentAlpha >= 1.0f) { outlineObject.SetTransitionState(false); }}
HLSL
How it works:
SetTransitionState(true): This flips the bit in the Rendering Layer Mask from 20 to 30. The Render Feature immediately picks this up in the next frame and moves the object to the “Transition” textures.
UpdateObstructionFade: Since the outline material is distinct from the object material, we manually pass the alpha value to the outline’s MaterialPropertyBlock, ensuring the line fades out in perfect sync with the mesh.
And that, essentially, is how I spent 70+ hours “reinventing the wheel” for outlines.
Is it over-engineered? Probably. Is it laggy? More than I hoped for. Does it solve my specific problem of pixel-perfect, depth-aware, transparency-friendly outlines for a 2.5D game? Yes.
If something is not clear, if I forgot to explain something or if you need a bit of help, you can reach me out in my Discord: https://discord.gg/RnErrAHX
If you played the game before, you might have noticed that you finished inventory space pretty quickly: the player had just 6 slots plus 1 equip slot where the player could place any object. You also had an extra utility slot, but you could only place the gathering tool there, for now. Looking for basic resources was a pain, and you constantly had to drop items around to take only the bare minimum needed at that moment. The base was full of dropped items, with no storage possible.
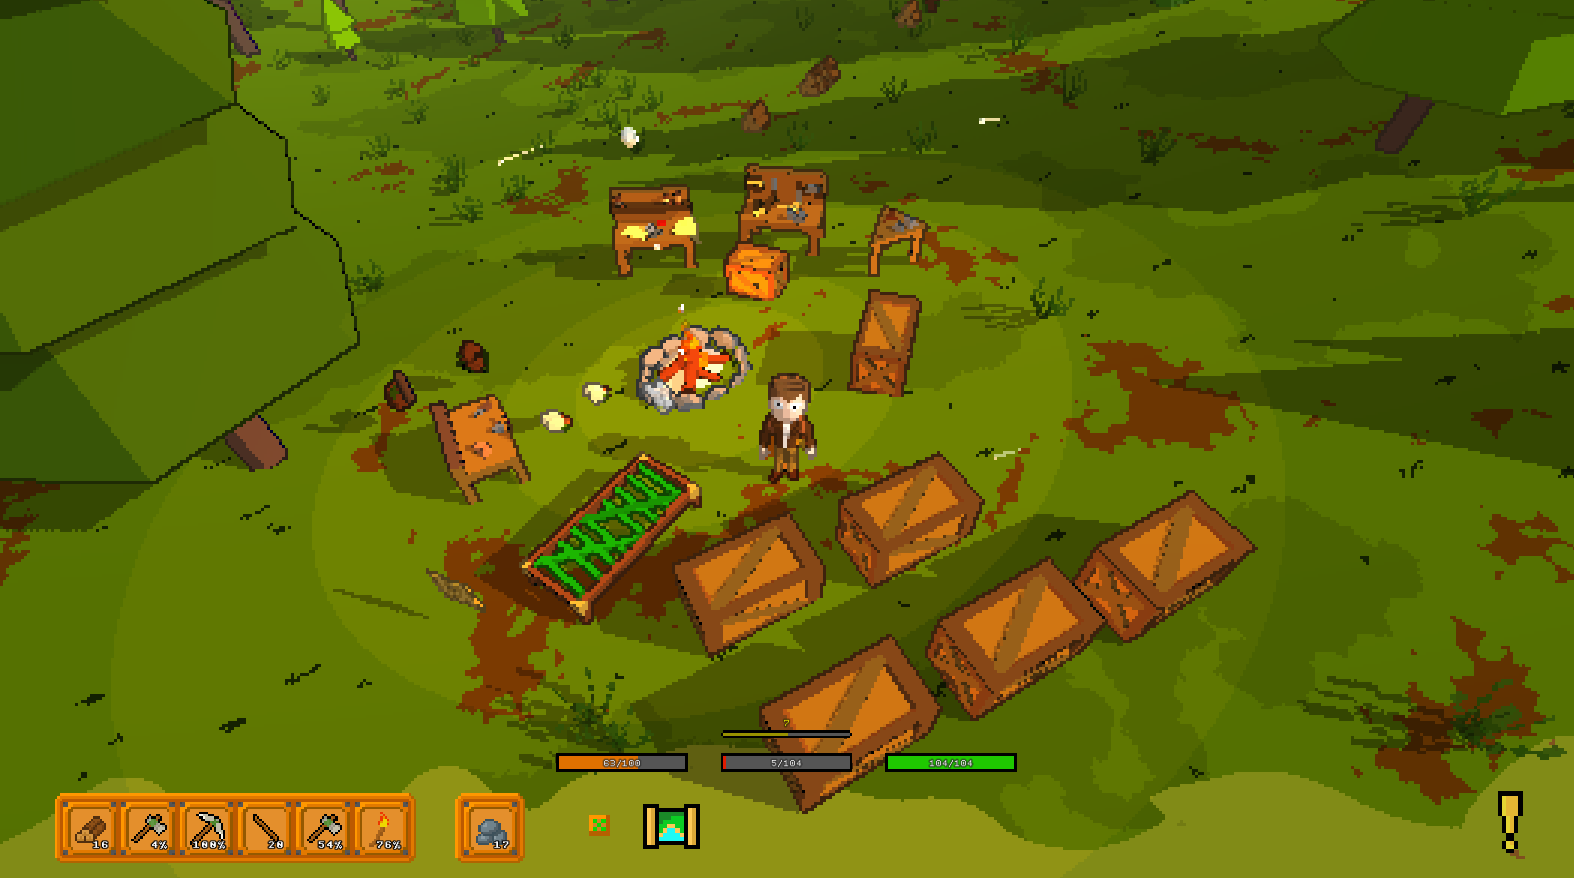
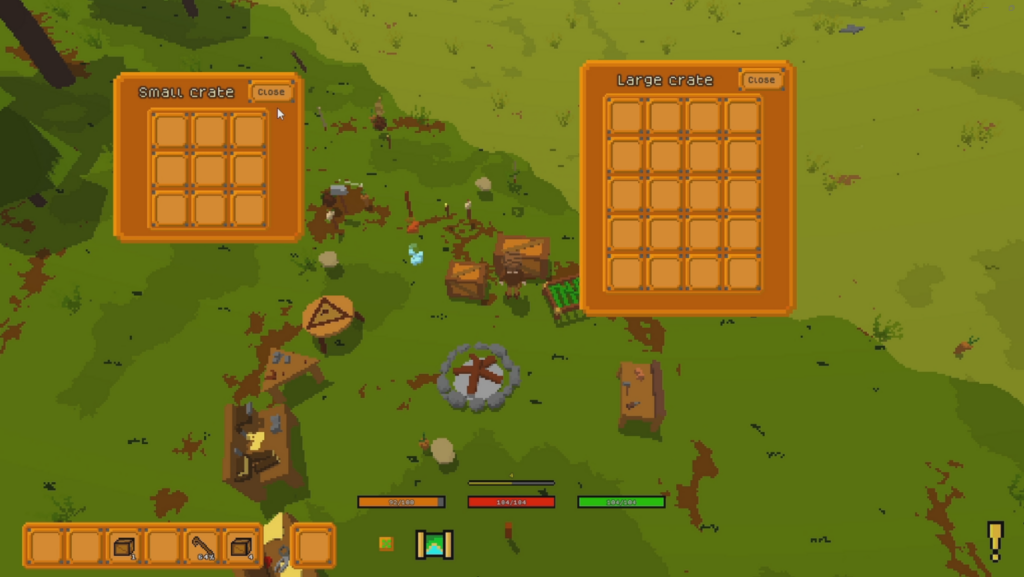
No more! Version v0.0.6 focuses on refining these very annoying mechanics, finally tuning one of the most annoying things currently in the game. You now start with an extra 6 slots in your inventory and you can craft and equip a Backpack (goes on the new back slot) and a Small Pouch (goes on the utility slot, so you can now choose if you want to hold more items or gather more with the gathering tool). You can also craft some small or large Crates to store items in your base! No more dropped items around.
Small and large crates open.
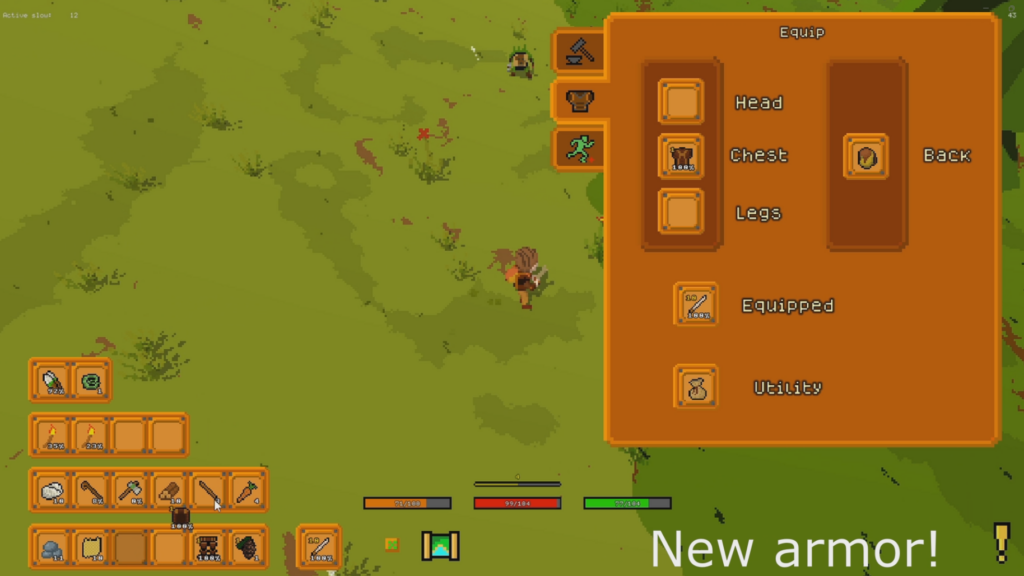
You can now craft a full, complete Wooden Armor! It slows you down a bit, but it’s a real blessing for damage reduction, reducing incoming damage by 15. Each piece protects you the same, but has a different chance of getting hit: you’re hit in the head 20% of the time, in the legs 30%, and in the chest 50% of the time (note: damage is the same for every body part, hitting you in the head is not a crit and does not damage you more than being hit in the chest). After the hit, if you have the armor equipped in that body slot, it negates some of the damage, reducing durability. Each level 1 wooden armor piece covers 15 damage (floored at 0, so you can actually take no damage if you’re tanking less damage than what you’re taking). Wooden armor has durability and can be enchanted, doubling its armor every 30 levels.
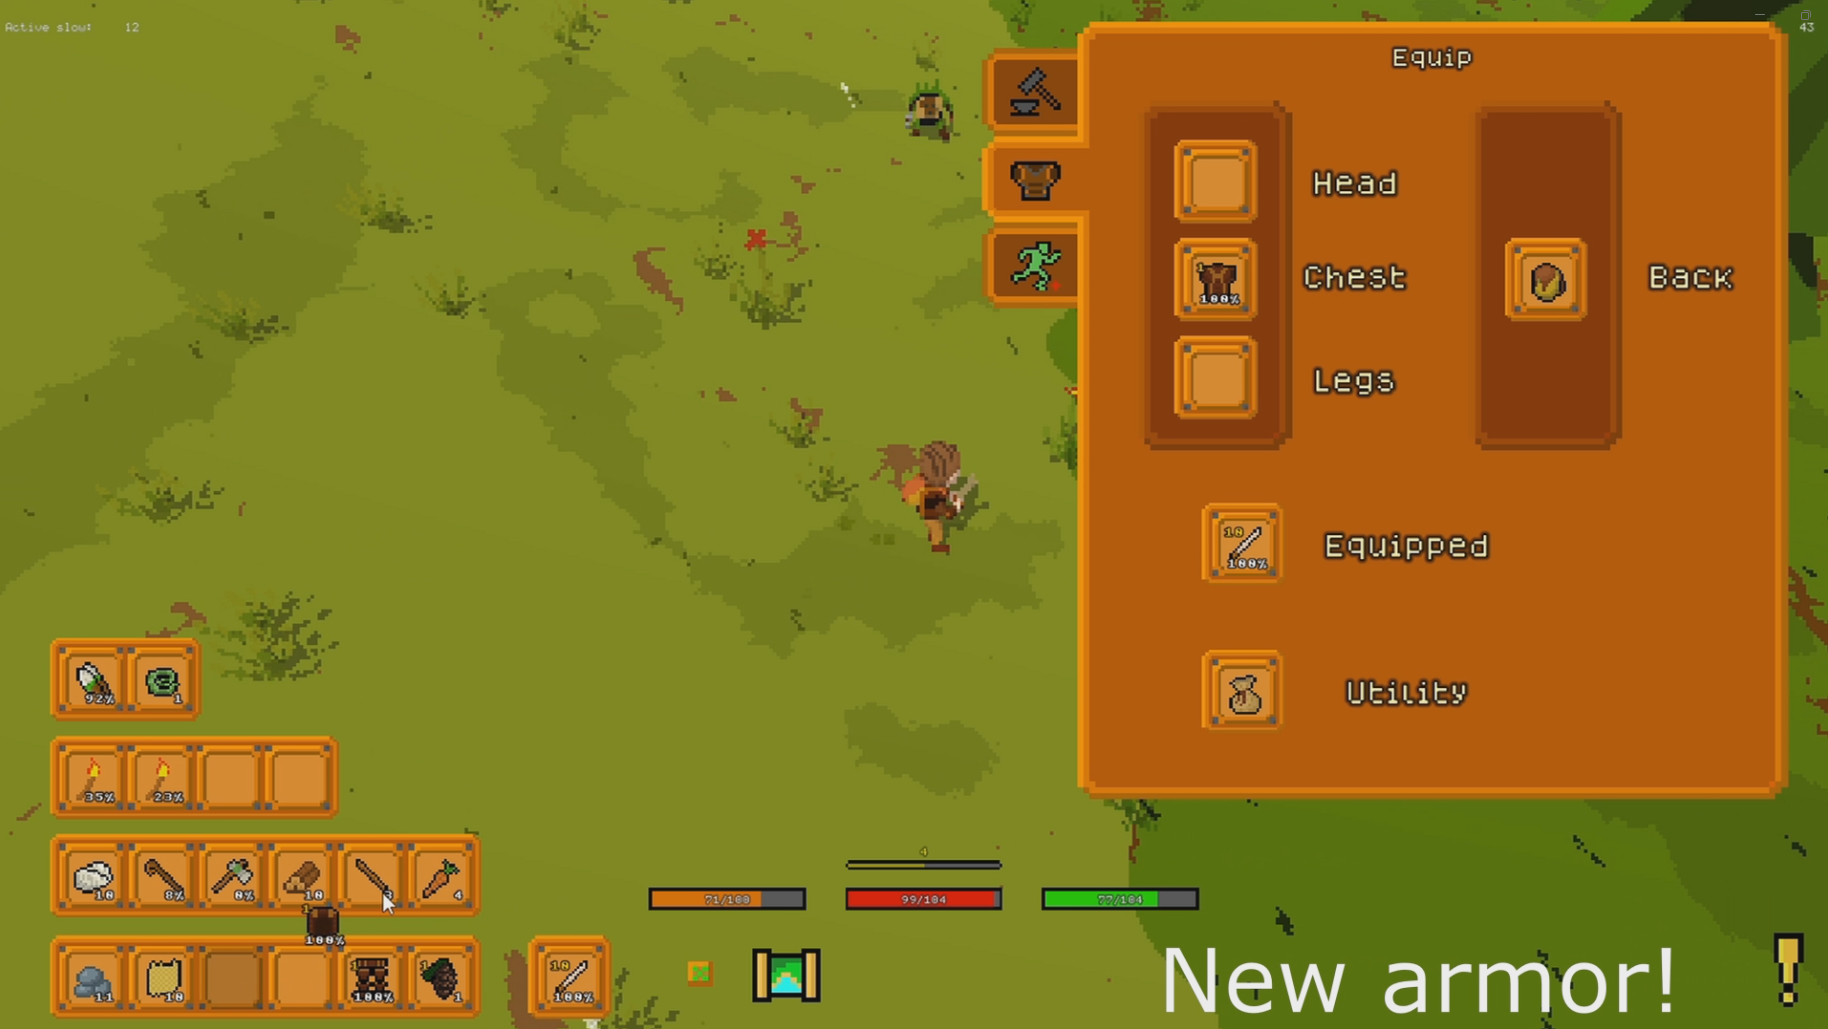
Armor slots are now unlocked and you can equip wooden armor.
This version also adds many new materials – planks, fabric, and ropes – and two new dedicated crafting stations: the Woodworking Table and the Tailor’s Table. You can craft the new materials both in the Improvised Crafting Table and in the new stations, but it’s cheaper if you use the dedicated station (e.g., planks cost 6 wood in the Improvised Crafting Table and only 4 wood in the Woodworking Table). Those stations are just the first level of dedicated stations; more will come later, with more efficient ways to craft things and more items to craft.
Video showing main features added to version 0.0.6
Changelogs: [ADDED]
Ropes: a more refined version of plant fibers
Planks: used for new craftings
Fabric: crafted from plant fibers, currently used to make the backpack and the small pouch!
Woodworking table: first, basic version of a specialized crafting station! The wood working table is specialized on basic wooden items and furniture.
Tailor’s table: used to craft clothing (not yet added) and other fabric-related content. Also a starting-level crafting station
Ropes, planks and fabric can be crafted in both the improvised crafting station and on the dedicated crafting stations. In the dedicated stations, crafting them is cheaper.
You can now craft sticks in the woodworking table! They’re kinda pricey, one wood per one stick.
Added small crate, finally you can store your items! It has a 3×3 slot space and cost 4 planks.
Added large crate, costs 7 planks, is slightly larger and has 4×5 slot space.
Added back slot and the first backpack! Adds 4 extra inventory slots when equipped.
Added small pouch! Equip it in the utility slot to have 2 extra inventory slots when equipped.
Added wooden armor set! Slows you down a bit but has a decent amount of armor. Enchantable and can be repaired, every piece.
Added controls options (keybindings) to the options!
[CHANGED]
Increased inventory space by adding an internal inventory of 6 extra slots, you can open it by pressing tab
Equipping or wearing things now can have a visual effect on the player (e.g. backpack, armor etc)
You can now zoom in closer and zoom out further
Unlocked all armor slots
Reduced slow by all tools and weapons when equipped. Maximum slow is now 25% when full wooden set and club are equipped.
Bushes lose their berries (they spoil away) after 5 days, then they start regrowing.
Here we are: this is the last post I’m rewriting before reaching the current date. Version v0.0.5, “The Veteran’s Strength,” is the latest version available on Itch.io at the current date of writing (which is December 2025).
Before talking about v0.0.5, I’ll clarify why development stopped again for some months. After v0.0.4, I finally graduated and got my bachelor’s in CS. I moved out of my parents’ home, and in the middle of this update, a slightly unpleasant thing happened: on September 5, after some days of what appeared to be a common illness, I got both pericarditis and myocarditis, in mild-severe form, with some damage to the heart which is yet to be evaluated. I’ll need to do another MRI and a stress-test ECG to check if I have any permanent damage left or if the heart healed in a “good” way, not leaving any scarring or arrhythmias. This is usually done 6 months after the infection started. I totally didn’t expect to start the month by going to the cardiac ICU, but hey, you play whatever the event in the game is. Am I not coding a survival? For sure, this felt like a survival, even if you can literally do nothing but wait for the myocarditis to heal itself. If you’re interested, look up more on https://www.myocarditisfoundation.org/.
I’m not gonna bore you with all the details, so let’s just say that for now I feel fine, and I’m probably gonna make a full recovery, due to my young age and only a few complications. It’s mostly the psychological stress that slowed down everything in my life, so I stopped coding for more than one month. I began slowly coding again in mid-October.
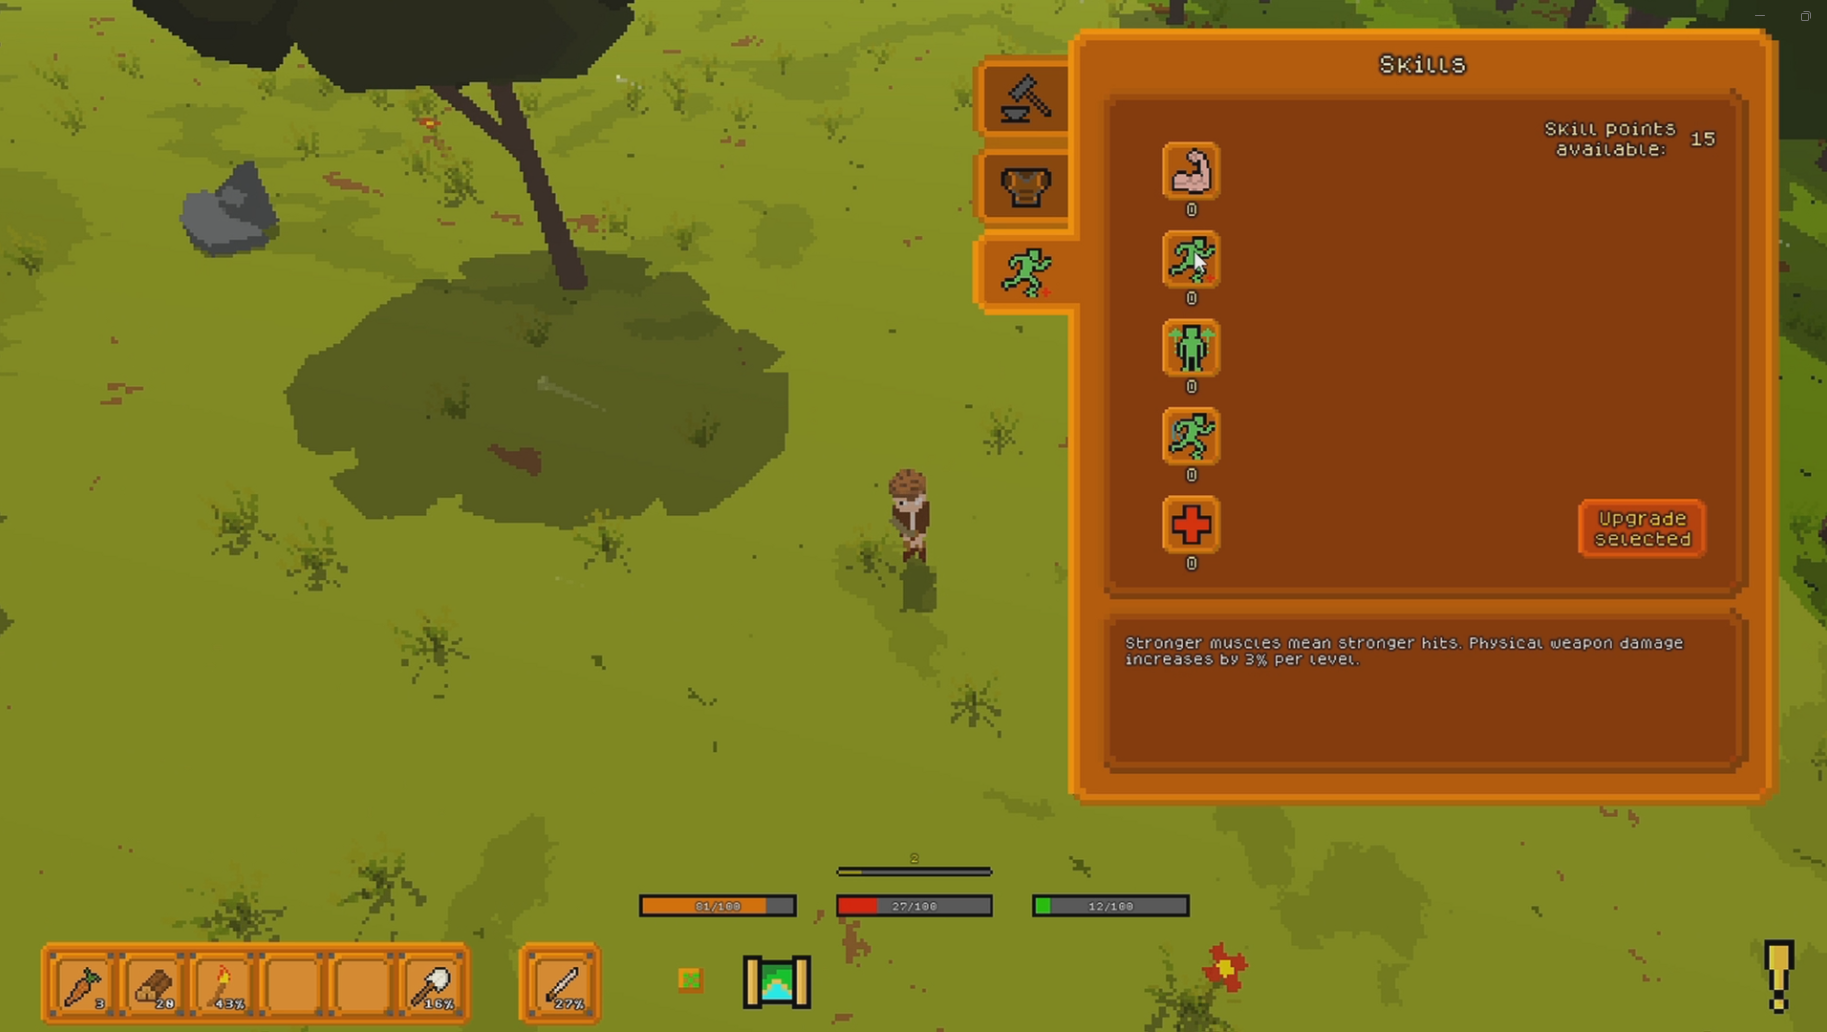
Version v0.0.5 is focused on adding a bit of depth in a puddle. Its main theme is skills: now the player can get experience when killing enemies! Experience makes the player level up, and every level gives you a point which you can spend in 5 different skills, which affect your damage, stamina, speed, or health.
Level up and show-off of skills.
Another game-changing feature is the repair station: now the tools and weapons do not break, when they reach 0 durability they can still be used for a fraction of their speed and damage, and they can be repaired – for less materials used to build a new one – in the repair station!
Repairing a tool.
Enemies also drops souls: those items have a level, and can be used to upgrade every weapon. The weapon’s levels increase damage and speed!
Player using Forge of Souls to increase a weapon’s level.
Other features:
You can replant trees with their relative seeds!
Every tool can be used to attack!
Trees regrow when they reach maximum age
Goner has some drops
Enemies (Goner) has levels, based on distance from the spawn
Changelog:
V0.0.5 – “The veteran strength” [Skills]
[ADDED]
Levels! Now the enemies give you experience. You automatically level up, each level costs 1.25x the previous level.
Skills page! Each level grants you one skill point.
Vigor skill: adds +4 HP permanently.
Speed skill: each point makes you move 2% faster (both run and waking speed).
Recover skill: +4% stamina recover speed.
Endurance skill: +4 permanent max stamina.
Strength skill: 3% more physical damage per skill level.
Every tool can be used to attack! Different tools have different speeds, knockbacks, damage etc. They’re very weak and they get worn very fast if you use them as a weapon: consider them an emergency weapon!
Plantable trees! Now every tree has its own seeds. Every tree – except the palms – drop a varying amount of seeds, depending on the tree age. The palm does not yet drop the coconut: it will be added in future versions, in custom ways, since the coconut will be a food.
Repair station! Items can now be repaired. If you con’t use a whole item, the remaining amount will be saved in the material fragment bank, linked to that repair station. Removing it does not drop the fragments!
Goner now has levels! Each 100 distance units average level increases of 1, with +-5 levels noise. The level impact goner speed, damage, attack speed and experience reward given to the player.
Goner now drops from 0 to 3 of the following items: sticks, plant fibers, rocks or berries. (each random item is chosen randomly between those, they can all be the same or different)
Added sound when selecting different crafting recipes.
Added compass to minimap!
Items can now have levels and custom properties, with their own merging rules. Level property blocks stacking between identical items with different levels.
Added the Forge of Souls as a new placeable structure.
Weapons now have levels too! Each sword needs a few souls to be forged.
Goner now drops souls. Soul levels depends on Goner level, and souls can be used to upgrade weapons.
Added rock hit particles to the pickaxe.
Added walking, running, landing and jumping terrain particles!
Added crafting error messages and sounds.
Added a repair error sound if an item can’t be repaired.
Added an error message and sound when trying to upgrade a skill with nothing selected.
Added a small advice in the first tutorial: press TAB to open your inventory!
Added click sounds to crafting recipes and tutorial task buttons.
Added sound when switching pages in the HUD.
[CHANGED]
Items do not break anymore! Trying to use an item with 0 durability will have different behaviours depending on the item. All the items that can attack (both tools and swords) do half the damage. The crowbar and the hammer have the attack speed halved, as every other tool. The crowbar and the hammer cannot be used to dismantle or break. Every other tool can still do its job but at half the speed, except for the shovel that does it 3 times slower. The swords have their speeds halved too.
Improved object spawn performance in chunks.
Enemies are teleported away from the respawn point after the player dies.
Trees now cycle their growth: after they reach max age, they become small again.
Rock particles now fade out before vanishing and collide only with terrain.
Tweaked leaves and wood colors a bit, and leaf particles are now flat planes.
Changed the default UI error sound.
All shaders now load at initial game loading phase.
[FIXED]
Fixed a bug where the player could smash or dismantle the crafting table and campfire from any distance.
Fixed a bug that caused Goner steps to always be ‘rocky’ type.
Scrolling task panel elements/crafting recipes no longer zooms the player in.
fixed club blocking the player after the third slash.
Fixed a bug that caused dropped items to despawn if you traveled far enough and chunks despawned.
Fixed some UI audios to have a lower volume randomly.
Added percentage at mouse object when dragging some item with durability.
Fixed spacebar activating crafting by mistake.
Fixed a zooming issue when moving the cursor in and out of UI elements.
Fixed dropped items accessing GameObjects from a different thread.
Fixed axe goner material (it was transparent and had the wrong color).
Fixed kolossoi not being mineable anymore. (“Wait, what the hell is Kolossoi?”)
Version v0.0.4 is the last version which doesn’t focus on any main feature. This update increases the playability of the game according to feedback from my friends and a very few early testers. It introduces general Quality of Life adjustments.
The player sleeping.
For example, you can now place lit torches. Before this update, if you found an enemy at night, you either had to equip a torch or a sword. If you were nowhere near a lit campfire, this meant that you had to fight in complete darkness: a very annoying mechanic that I never liked in games like Don’t Starve.
A player placing many torches on the ground.
This version adds a new way to move with the mouse, a key to automatically interact with the closest object (e.g., gather the closest item or chop down the closest tree), a bed to skip the night, and a mechanic to destroy or remove placed objects. There’s absolutely no new gameplay at all, but many things that make the journey slightly less frustrating.
The player removing some objects.
Changelogs:
V0.0.4 – “A pleasant stay” [General QoL]
[ADDED]
You can now start automatically an action (gathering items, chopping trees, mining rocks etc.) by simply pressing F instead of clicking with the mouse.
You can move by pressing CTRL and left click anywhere!
Added an option to decide how much trees can become transparent when the player is behind them. When set to 0, trees stay completely visible.
When trying to craft an item without enough materials, an info text pops up telling you what you need to finish the crafting.
Beds! You can craft now the improvised cot. It’s definitely not comfy, sleeping through it might remove a bit of health. You also consume less hunger when sleeping, depending on the bed quality.
Task panel helps you go through the game, when you don’t know what to do!
Crowbar! Useful tool that helps you pick up placed objects.
Hammer, similar to the crowbar, but it breaks down placed objects and gives you a percentage of the materials used to craft them. You get between 30% to 100% (random, per-material list) the amount used to craft the object.
New equip section in the HUD! Now you got the crafting AND the equip panel in the same panel. Select them with the left buttons. Note: armor is locked, will be unlocked in future updates.
Flint gathering tool, a simple tool used to increase the chances of getting harvestable loot (plant fibers, berries, hemp roots etc). You get around 30% more loot. Place it in the utility slot and it will be automatically used!
New section in menu which shows a countdown for the next coming update!
E.L.I.S.A. text after spawning!
[CHANGED]
Lowered disclaimer text
You can now place torches on the ground! Super useful during night, to fight or use tools to get resources. Remember: to drop a placeable, you can press LEFT ALT + left mouse click to drop them from the inventory.
Carrots now heal for 2 HP each when eaten.
Reduced Discord and Bluesky social buttons size in menu.
[FIXED]
Cursor object font (the text used to inspect objects) had a different font from Dogica.
Social icons were above loading and saving black panels when game was in menu scene.
Now using a sword while moving to do an action (e.g. gathering an item) correctly stops the action.
If an option is missing (e.g. due to a new version of the game) it’s added with a default value now.
Lights with low intensity gave a “negative” lighting to main light, resulting in a dark area around torches or campfires during the day. This was due to a shader bug which added main light color to every object, resulting in a lighter color than what the material had. Thus, I needed to recolor most of the objects; you can notice the difference from ver. 0.0.3.1 and this one.
Fixed a bug where you could navigate some buttons (crafting, map etc) with W S keys and select them with space.
Plant fibers had a burn value 2.5 times higher than wood, now it’s half, like the sticks.
Fixed a bug where mining would drain 5 stamina even when stopped mining.
Fixed mining animation that checked if player could mine if he had at least 3 stamina (mining consumes 5 per hit)
Fixed a bug that caused recipe buttons to show outside of the panel and could not be scrolled.
Fixed a bug where you could change target during an action and do the action to that target, even if it’s distant (e.g. chop a tree, change target and chop another distant tree)
I’m Davide, the solo developer behind Please, Enjoy Your Stay. This is the first actual devlog I’m making, and I hope you’ll find it interesting!
As you might’ve noticed from the page, PEYS is a survival game – more precisely, a sandbox (well, not yet!) survival with many RPG elements (mostly infinite progression, achieved through enemy levels, weapon levels, skills, etc.). The game aims to entertain you indefinitely: I’m not planning to add a “real” ending where you’ve mastered everything, beaten every boss and the game just becomes easy and boring, as happens in many other survival titles.
Currently, the game is… kinda boring. It’s empty!
I’m spending a lot of time implementing core mechanics before adding variety. I’m following a horizontal-then-vertical approach: first I build many core systems, and then I’ll add enemies, food, base building, and so on. This way, the entertainment should grow exponentially.
At the moment, you can:
eat berries and carrots (that’s it!),
craft items (and use a makeshift crafting table for extra crafting),
use tools like the axe, pickaxe, and shovel to gather resources,
place some items and remove/destroy them with the crowbar and hammer,
sleep through the night (since it was extremely boring to wait 10 minutes doing absolutely nothing),
craft torches,
use a few sword-like weapons,
upgrade tools from stone to flint.
There’s also a small tutorial/task panel to help you with the very basics.
In the coming update, you’ll be able to repair broken tools and weapons (they won’t vanish anymore, but instead will just become slower and weaker at 0% durability), fight enemies with levels (making them harder and faster), collect souls from those enemies to enchant your weapons, replant trees, and level up by killing enemies to unlock useful skills that make your character tougher, faster, and more enduring.
This upcoming update, version 0.0.5, is the last one focused mainly on mechanics and quality-of-life improvements. It doesn’t add a lot of new gameplay (yes, you can enchant weapons, kill stronger enemies, and level up, but there’s still only a single enemy type and three sword variants). However, it adds much-needed thickness to the game, which will be extremely useful once real gameplay content arrives.
The next update will be the last one without major gameplay additions. It will focus on the player’s inventory: as you can see from the screenshot above, there are currently no chests, and the inventory is very small. With the increasing number of items I’m adding, it’s becoming annoying to have everything floating around. So this update will mainly add chests (of various sizes), a few more details (like a new woodworking crafting station), a larger base inventory, the first backpack, and maybe even the first armor: wooden armor.
After that, update 0.0.6 [edit from the future: v0.0.7] will finally bring the fun: it will introduce many new enemies, raids, improved AI, and more enemy-related content. Surviving will become a real challenge, and you’ll finally be able to level up, upgrade things, and scale faster.
That said, the game – even in its current empty state – has received almost no feedback. Numbers are very low everywhere. Paradoxically, I got more likes earlier in development, back when I had almost nothing to show (not even a player). So, even though it’s obvious that the game barely qualifies as a “game” right now and performs badly, questions still come up: Will this ever become a good game? What if, even after adding real content, nobody plays – or worse, dislikes – it?
One thing is certain: graphics (and audio) are completely provisional. I’m no artist, and it shows. I’ll need a lot of help creating a real, unique style and improving all the icons, UI, animations, and music – not to mention making a proper logo (I don’t even have one yet!). But for now, I need to see at least some numbers grow, just to confirm that the game is fun and worth investing more time and money in. After all, players come for graphics, but stay for the gameplay… right?
The update I’m currently working on, version 0.0.5, will go live later this week, most likely on Saturday. Be sure to check it out! I’d really appreciate any feedback on the current state of the game: even if it’s still almost empty, the earlier I can adjust my aim, the better.
Thanks for reading, and don’t hesitate to reach out if you have any questions <3
At this point, after years of development, even if my game is completely unpolished, with an awful graphic done just as a placeholder and with two – maybe three – features to be tested, I craved dopamine. I wanted to release my game and have an early feedback. So I quickly set up what was missing from the game to be published and created a middle and smaller version, v0.0.3.1, made just for the release of a closed pre-alpha.
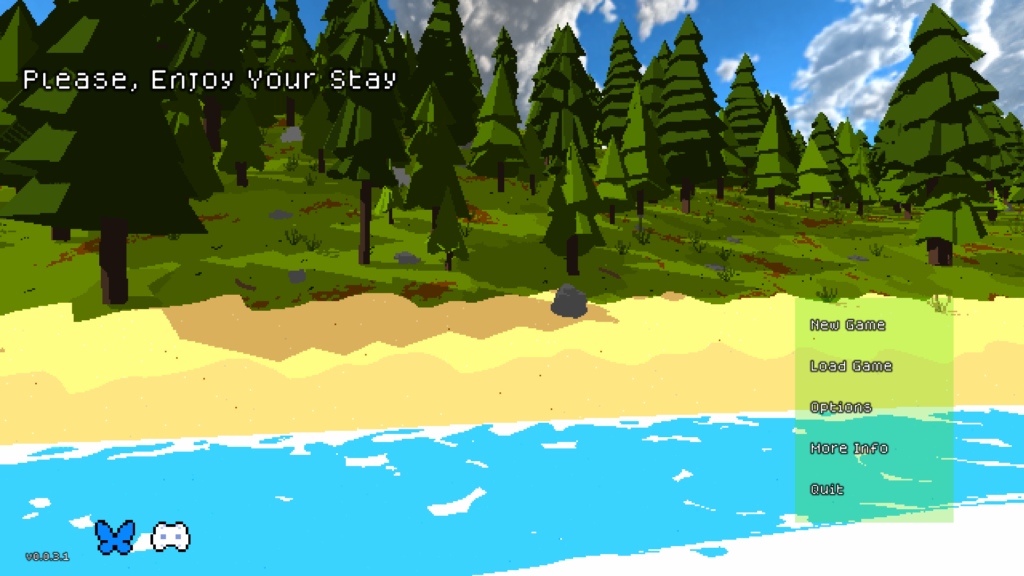
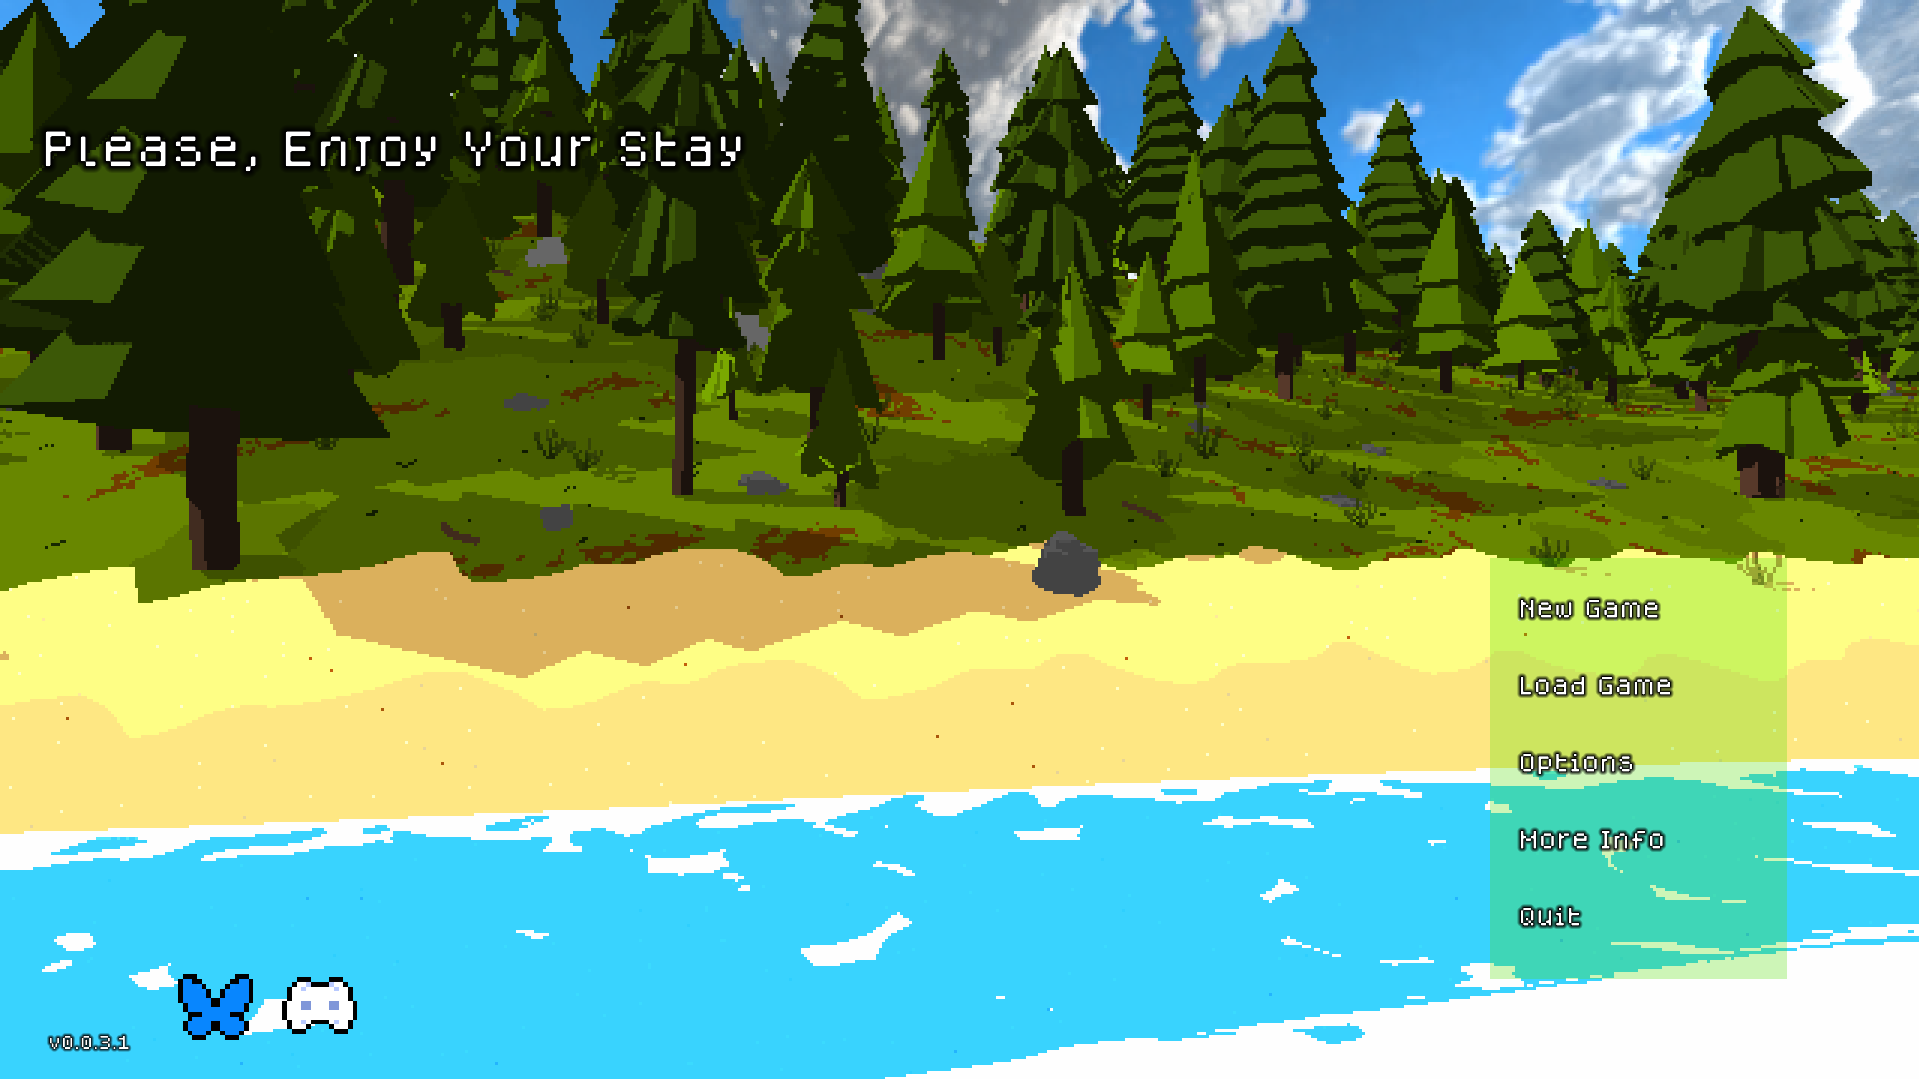
A slighlty refined menu
This version adds the title in the menu, a credits page, socials on menu, the game icon on the executable, some item descriptions and the very important demo/beta/pre-alpha disclaimer.
Of course only a single guy downloaded that (and it also gave me precious advice). No one else downloaded it, even as today (December).
Changelogs:
V0.0.3.1 – “A warm welcome” [Polishing for closed playtest]
[ADDED]
Demo disclaimer
More info panel with “feedback”, “what to do?”, “credits”, “how to support” and “changelog” panels
Placeholder title in main menu
Social buttons on menu
Placeholder game icon (“Senfineco games” logo instead of a real logo)
[CHANGED]
Every item description. It’s shown in the crafting panel.
Reduced the time it takes to move after slashing with third sword-like weapons, allowing movement before the animation fully ends.
Increased description space for items in crafting menu.
Did you know? The game had no sounds up until this version.
We’re in 2025 now, I almost got my degree, and version 0.0.3 wanted to give a bit of depth to the game – and make it sound like a game. This is another version without a clear goal but to polish and refine the current “base” for the game. This version adds:
Flint and flint tools: faster and more durable
Hemp (another plant fiber source—you can never have enough of that)
A wild carrot: woah, the second food source!
Minimap!
Waypoints, you can follow them in the game
Basic options
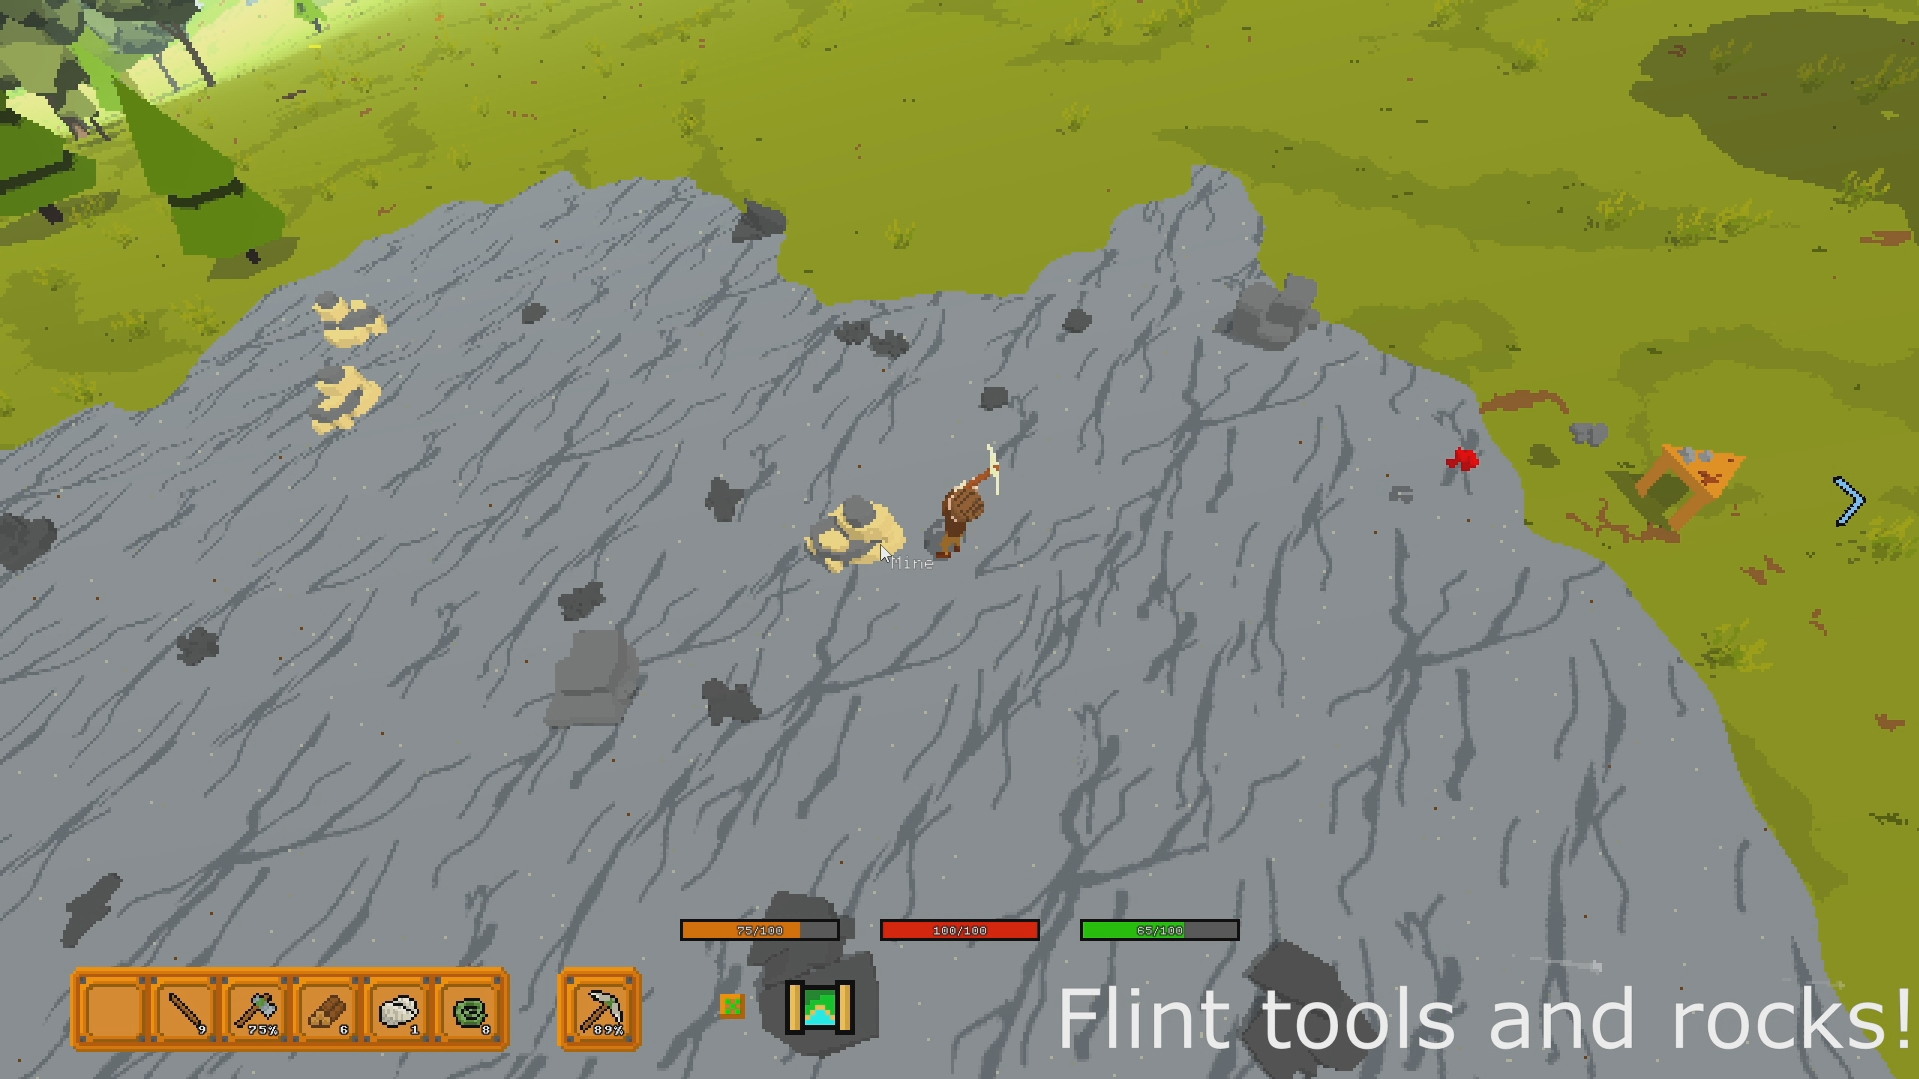
V0.0.3 small recap video
The minimap was not originally planned, but I noticed that I continued to get lost, and the game has “exploration at its core”: not a good combo. It was a bit hard, but in the end, I’m happy with the result. Of course, as everything, the graphic is just a placeholder made in two seconds with Gimp, up until I can afford a real artist.
I also added the option to reduce the pixel quantity: up until this version, the “pixelation” effect enlarged pixels by four times; now you can select between 1 (full quality) and 4. I noticed that many people in the Bluesky or Reddit feedback wanted fewer pixels and thought that being too pixelated looked very bad (sigh… my work).
Changelogs:
V0.0.3 – “Sounds of survival” [More objects, sounds]
[ADDED]
Sounds! You got a sound for almost everything now. Now it feels like a real game.
Added version number on the bottom left of the screen.
Light small rocks are now flint rocks. They can be gathered without tools for 1 flint.
Rocks, when mined, now drop an additional flint, 1 + 1/4 chance to drop another one.
Flint sword. Almost as fast as fighting stick, but with more range, damage and more than twice as durable.
Flint axe. Quicker and almost twice as durable as stone axe.
Flint pickaxe. First pickaxe, slow but it does its job. It’s not much durable; it lasts about 9 mined rocks. You can still mine a minimum of 9 flint with that.
Flint large rocks. Spawns between 2-5 flint pieces and 1 rock + 1/4 chance to get another rock. Naturally occuring around the world!
Flint shovel. Used to dig things (no way??).
Bush roots can now be digged to harvest other plant fibers
Carrots! Dig the white flowers and you get 2 of them.
Hemp. Can be harvested to get 1 plant fibers. After harvesting the hemp bush, you can dig hemp roots to get hemp roots crafting item.
Minimap! You can now place waypoints in a minimap and follow them with an in-game arrow. Press M to open or the Minimap icon in the UI. Death also adds a death point automatically in the minimap.
Hemp roots. Currently useless.
Added options. Audio is customizable, and you can choose how much “pixelation effect” is applied to the game texture. You can even disable it selecting “1”.
You can now create or load a world in the menu by pressing “Enter”, and pressing “Exit” will close whatever panel was opened.
[CHANGED]
Torch now last for 5 (real) minutes. Previous duration was 100 seconds.
Reduced terrain slope (lowering max terrain with it)
Reduced default pixelation of the game.
Changed editor version to Unity 6. Hopefully this will not break anything.
Goner now changes space target if it’s stuck moving for more than 10 seconds.
Campfire now does damage when an entity is above it and the campfire is lit.
Max stamina recharge speed is now applied when above 60% hunger (from 80%).
Min stamina recharge speed is now applied when under 15% hunger (it was 30%). Enjoy more stamina!
Inverted Q and E camera rotation axis.
Now campfires do damage when the campfire is lit and an entity is above it.
Changed every font in the game to make it more readable.
Removed Unity splash screen.
Campfire now cost 5 rocks instead of 10. Torch cost 2 sticks.
Reduced many other recipes material.
Rocky biome is twice as common now.
Disabled “F” key for free camera movement for debug.
[FIXED]
Fixed a bug that caused the in-game canvas size to be smalled than 1920*1080, which needed resizing for each HUD of the game.
Fixed loading and saving screen having different size from menu and game screen.
Player camera rotation and player rotation now are correctly saved and loaded.
Fixed campfires bug that caused no light, lights increasing to infinity and a small light staying lit even when campfire finished burning.
Items could be taken when player was dead (e.g. when saving, exiting and reloading the world after dying)
Dropped items now can change chunks where they are saved. This resolves possible errors/item duplications.
Health regeneration now applies only if the player is alive.
Fixed player resurrecting if it was dead but health was still somehow more than 0 and the player saved and reloaded the game (alive variable is now saved).
Fixed player could move while chopping trees if it timed correctly movement and mouse click
Fixed a bug where you could start a gather animation again when gathering.
Removed a “3” written above the stomach UI used to eat.
Fixed “pause” that could be activated during world loading.
Rotation and pause blocked again during spawn.
Fixed inventory being above loading screen after loading finished.
Fixed campfire light speed flickering too fast.
Torch and campfires lights now start with correct lights intensity when loading, according to campfire/torch fire intensity value.
Fixed a bug where the player could move after dying, before respawn animation began.
Fixed a bug that caused items to not be auto-gatherable after saving and loading a world.
Fixed torch and campfire sounds not looping correctly.
Hello again! This post summarizes the content and events added in version 0.0.2, “Welcome to Revo”.
This version plans to refine the 0.0.1 and add the basic features to call that game a “game”: a challenge and something to do. In a very primitive way, of course.
Some of the things added:
Plant fibers
Basic stone tools (a stone axe) and basic craftings
Stamina, hunger, and you can eat berries now!
A rocky biome where you find more rocks
Going underwater now damages you
The only enemy now spawns randomly
A refined version of the menu graphics – still a placeholder
After this version I took a final long pause to finish my university career and focus on my game as a full-time hobby.
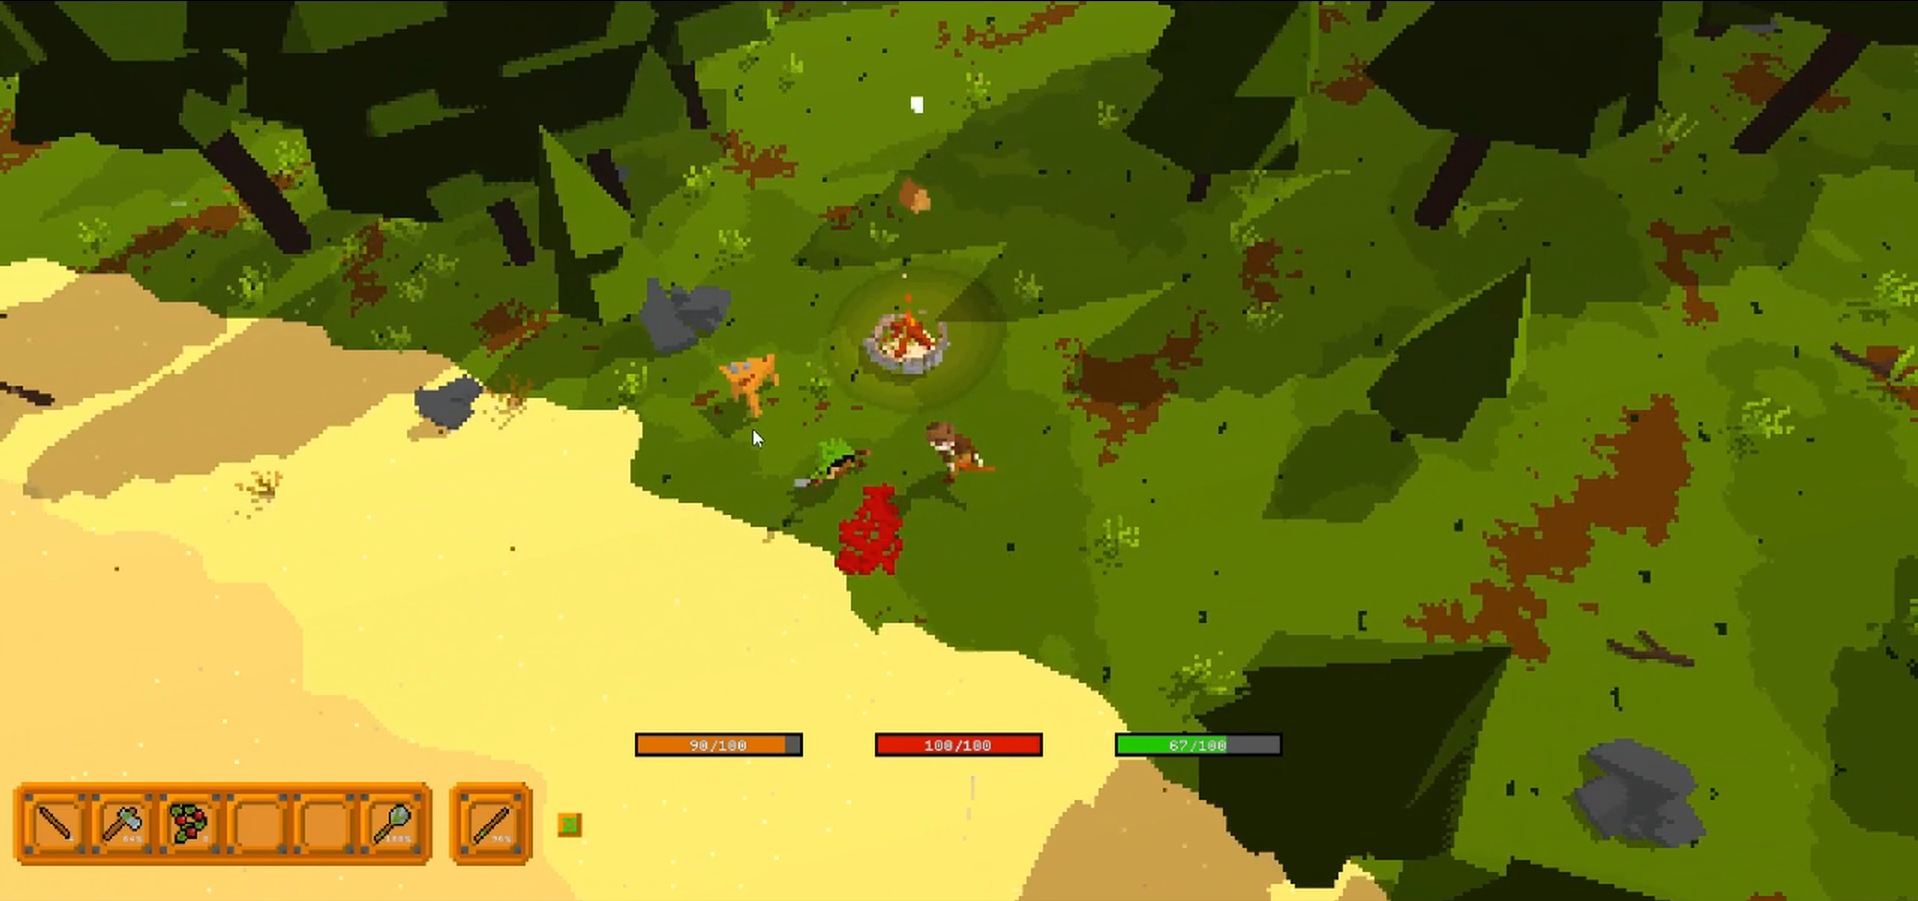
A short video showing all the basic features implemented in the game at the moment.
Changelogs:
V0.0.2 – “Welcome to Revo” [Eating, starving and tools]
[ADDED]
Rocky biome. Rocks are found more common here. No vegetable currently grows. Rocky biome is uncommon.
Stamina and hunger and its corresponding UI bars.
Health has now its UI bar.
Saving system for health, stamina and hunger.
Starving mechanic: food drops by 1% every 24 seconds. In 40 minutes a full hunger bars drops to 0. If the hunger bar is at 0, health will lose 1% per second.
Stamina let you run and jump. Every jump consumes 15 stamina points, running consumes 5% stamina points per second. If you don’t run for 4 seconds, stamina regens 3 points per second.
Hunger is linked to other player stats. If hunger is above 80%, stamina recharges 50% faster. If hunger is under 30%, stamina recharges 50% slower. If hunger is under 30%, player speed is decreased by 15%. If hunger is above 70%, player recharges 1 hp every 72 seconds (20 HP per day).
If the player is running food goes down twice as fast.
Player can now eat food. When hovering a food item, a stomach icon on the UI pops up. Dragging the food item to the icon will eat one piece of food (no matter how many you’re dragging).
Berries can now be eaten. They give 6 hunger points (2 minute and 24 seconds of real-time food value).
Eating berries restore 1 HP per berry (item).
Added grounded sticks (5 variants) and the stick item. Can be stacked up to 20. Has a burn value of 0.1 (half the wood value).
Trees now drop 1-3 sticks depending on tree’s age.
Bushes without berries can now be harvested for plant fibers. Harvesting a bush with berries will take 6 days to regrow berries, harvesting a bush without berries will leave it ripped and will take 6 days before regrowing (without berries, and the berries regrow countdown starts from then)
Stone axe. Lasts only 55 tree hits and it’s very slow. Can be crafted with 4 stone pieces, 3 sticks and 3 plant fibers.
Stone club. Extremely slow, but does a decent amount of damage as a first weapon. Crafted with 5 stone pieces, 4 sticks and 6 plant fibers. Lasts 40 hits. Slows the player by 20% when equipped. High knockback, gives 10 armor when shielding. Average range.
Fighting stick. Faster than the club, very low damage. 6 sticks and 2 plant fibers. Lasts 55 hits. Slows the player by 10% when equipped. Low knockback, gives 10 armor when shielding. Range is slightly above average.
Added basic menu graphics. Just a small background environment where the camera loops.
Goner randomly spawns around the world.
Post processing.
Player can still walk underwater, but it loses 10 HP per second. This is momentary.
[CHANGED]
Updated auto-gather items toggle placeholder to fit general UI style.
Removed placeholder axe and pickaxe items. Removed iron sword from crafting.
Torch light now goes from 100% to 80% with 100%-15% torch durability, and from 80% to 0% when torch durability is between 15% ad 0%.
Dropped items now have no friction.
Goner doesn’t damage the player anymore with any collision: it damages it only if the player touches it from above (you could jump on its head and stay there)
Refactored water shader. That was not supposed to happen in this patch but during a late-night insomnia episode I got an idea to make water waves move towards the shore, something that I was for a long time looking for. Took me 10 hours to make it work, but it surprisingly did. Delayed release by more than one week. Also, shader is available for free! Check out my website or https://github.com/Lazy3valuation/LazyToonShader
Goner has more range.
Swords now use 3 stamina per use.
Axe uses 3 stamina per chop.
Pickaxes use 5 stamina per use.
[FIXED]
Now player dies if health is 0, even if no events have happened (player only died if he took damage that would decrease its life equal or less than 0).
Fixed ELISA shader being purple and invisible during spawn animation.
Fixed ELISA invisibility mask not working sometimes.
Respawn position is now set at the spawn point of the world.
Fixed a bug where you would fall from the world if you respawned far away from where you died.
Fixed a bug where you would sometimes spawn underwater.
Fixed a bug where player would not die if it was falling.
Fixed a bug where chunks would not despawn if game was paused.
Fixed a bug where wind particles were far away from player’s camera.
Fixed a bug where item icons were bigger when moved outside inventory UI.
Fixed goner going halfway under the terrain with attack animation and hitbox moving with it.
Fixed many, many world loading and saving bugs.
Toggle key to auto-gather items was outside the screen.
Fixed “quit” key not working in menu.
Fixed inventory UI showing over ELISA “nothingness” during world creation.
Fixed rocks shaders, had too much fog when they were far away.
Fixed low LOD trees having lighter color than their high LOD tree variant.
Fixed water still being lit at night, also slightly modified its shader to fit a more cartoonish style.
Fixed torch dropped item being somewhat light at night.
Fixed trees and grass becoming too bright when a light source was close to them.
Fixed a bug where terrain mesh normals were not being calculated.
Fixed a bug where border values of the mesh were not being saved, causing terrain mesh normals to break when reloading a save.
Fixed a shader bug where wind would move trees from the base, resulting in a sort of “floating” trunk.
Fixed a bug where player would gather, chop or mine objects when it was looking at the wrong side of the object.
Fixed a bug where player would run faster if it was gathering, chopping or mining an object.
Fixed a bug where player would run slower when moving vertically (from the camera’s point of view). Now player appears to be moving faster when moving vertically, but it is movign at the same speed as the horizontal movement speed.
Fixed a bug where you could hit trees when they were falling down.
Fonts in the Menu were different. Now they’re al Dogica.
Fixed spawning particles moving and speeding up with player movement. Now they stay at spawn location.
Fixed player attacking before going to gather an object or when pointer was over UI if it had a weapon equipped.
Fixed a bug where the player would get stuck inside objects which could interact with (e.g. inside bushes) without doing any action.
Fixed fall animation playing incorrectly.
Fixed a bug where player could move when using pickaxe.
Fixed a bug where player could chop falling trees consuming axe durability.
Fixed a bug where durability was “shared” between same type objects in the inventory.
Fixed sword animation breaking when sword broke or when player changed item while animation was playing.
This is the first devlog post about the first version of the game. Since I lost the previous website and its posts, I’m just going to summarize what every version was planning to be and what it featured when it was completed, and I’ll paste the changelog at the end of the post. The current writing date is December 10, 2025 (European date), but the post date will be relative to when the versions were posted, at least until I catch up with the recent posts.
Before this project, I had some Unity experience with the classic “big” projects started by a newbie, and obviously thrown away. Yes, I’m not a “start small” guy; I’m more of a “Start big, fail and trash everything every time, and learn something new every time.” I tried to do many games before that, some which I wish to develop in the future, others that I don’t have interest in anymore. I started coding with Unity in 2018, as a hobby, completely self-taught.
The project started around 2021: for a university course, I had to code a small game to pass the exam, and I thought: “I want to do a small game which I can publish on Steam, so I can kill two birds with one stone.” I coded a very basic survival in around 50 – 100 hours, which had the player model, a static island as a “world” that generated objects randomly above it, zombies that spawn at night, the campfire, a basic crafting system, some buildings (walls and spikes) to protect you, and nothing more. It was definitely an overworked project for a single exam – even the professors said that – but it did its job well. The inventory system was brought from a game which was brought from another game of mine started in 2018, and is continuously adapted for every project I did. It’s a bit of a Frankenstein of code, but it does its job well.
“Inftested forest” game interface
After the exam passed, the game was… ugly and boring. You could be entertained for about 20 mins, then you had nothing to do anymore, and you would just drop it. But I liked the base, and I always liked survivals in general, so I began to code my own, real survival.
In the summer of 2021, I started the project “Please, Enjoy your stay.” Little did I know that this was a colossal project. Looking at hours of Sebastian Lague’s procedural generation tutorial I finally managed to code and adapt a little the procedural world generation. Coding this project has always been in small bursts of code sessions that lasted some weeks, between pauses of months, while I was busy procrastinating University, burning neurons on some video games like League of Legends, and working at my new job as a software developer. By mid-2022, the game had a solid procedural generation… and nothing more. Not even a player. Around then, I had coded for 200 hours. Another year passed; I coded some smaller features – like a basic player and world spawning animation – and then I decided to create a classic roadmap with versions and features. I started by adding what was missing to my “game” to actually be a game, and I created the plan for version v0.0.1, which featured a very, VERY basic video game: a player who can move, die if they take damage (nothing could actually do damage but anyway-), day, night, a world with some biomes, and not much more.
Procedural world with free camera movement, before adding the player. By far my most liked video ever (posted on Twitter/X) in 2022, with more than 80 likes.
Procedural generation at work.
The v0.0.1 was the pilot version, completed on Nov 6, 2023, which contained the fundamental mechanics of the game. It featured very basic (but complex to code) mechanics:
Procedural world generation with random seeds
Forest, plains and sea biomes
Trees, berry bushes
Day/Night cycles
Save and load worlds, objects
Player spawn and respawn mechanic, death, eating, stamina, movement
The first enemy, Goner – which could not spawn
Basic crafting, the first improvised crafting table
A basic version of an axe and picaxe – which you could not craft unless you cheated some starting materials
Torches, a campfire
A very basic version of a sword
A few other things
Just getting to this point, with a “walking simulator” as a game, a basic enemy – which you couldn’t even find and fight – costed me an astonishing ~415 hours of work, mostly spent on coding the procedural generation and the save system.
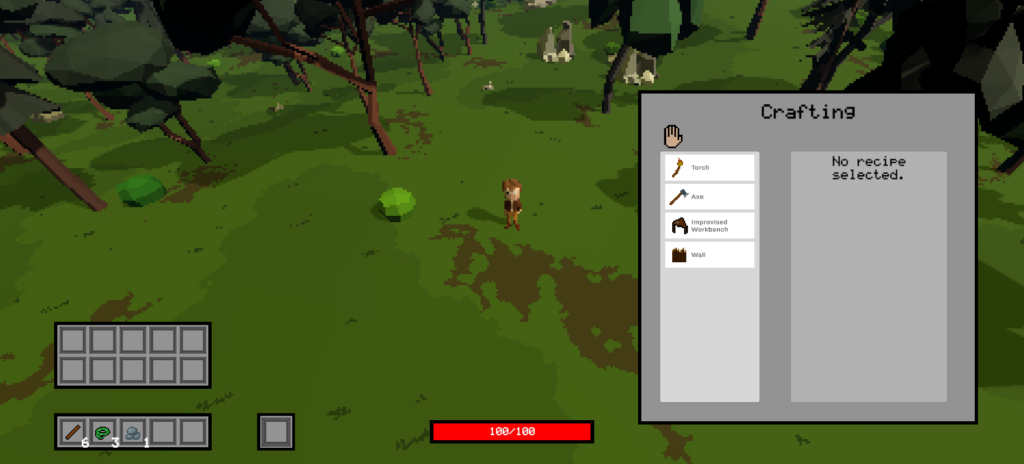
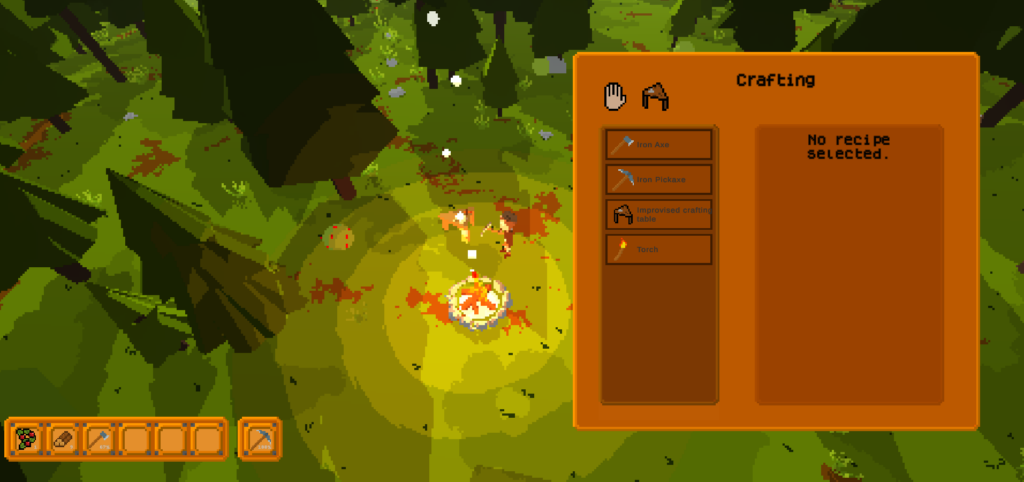
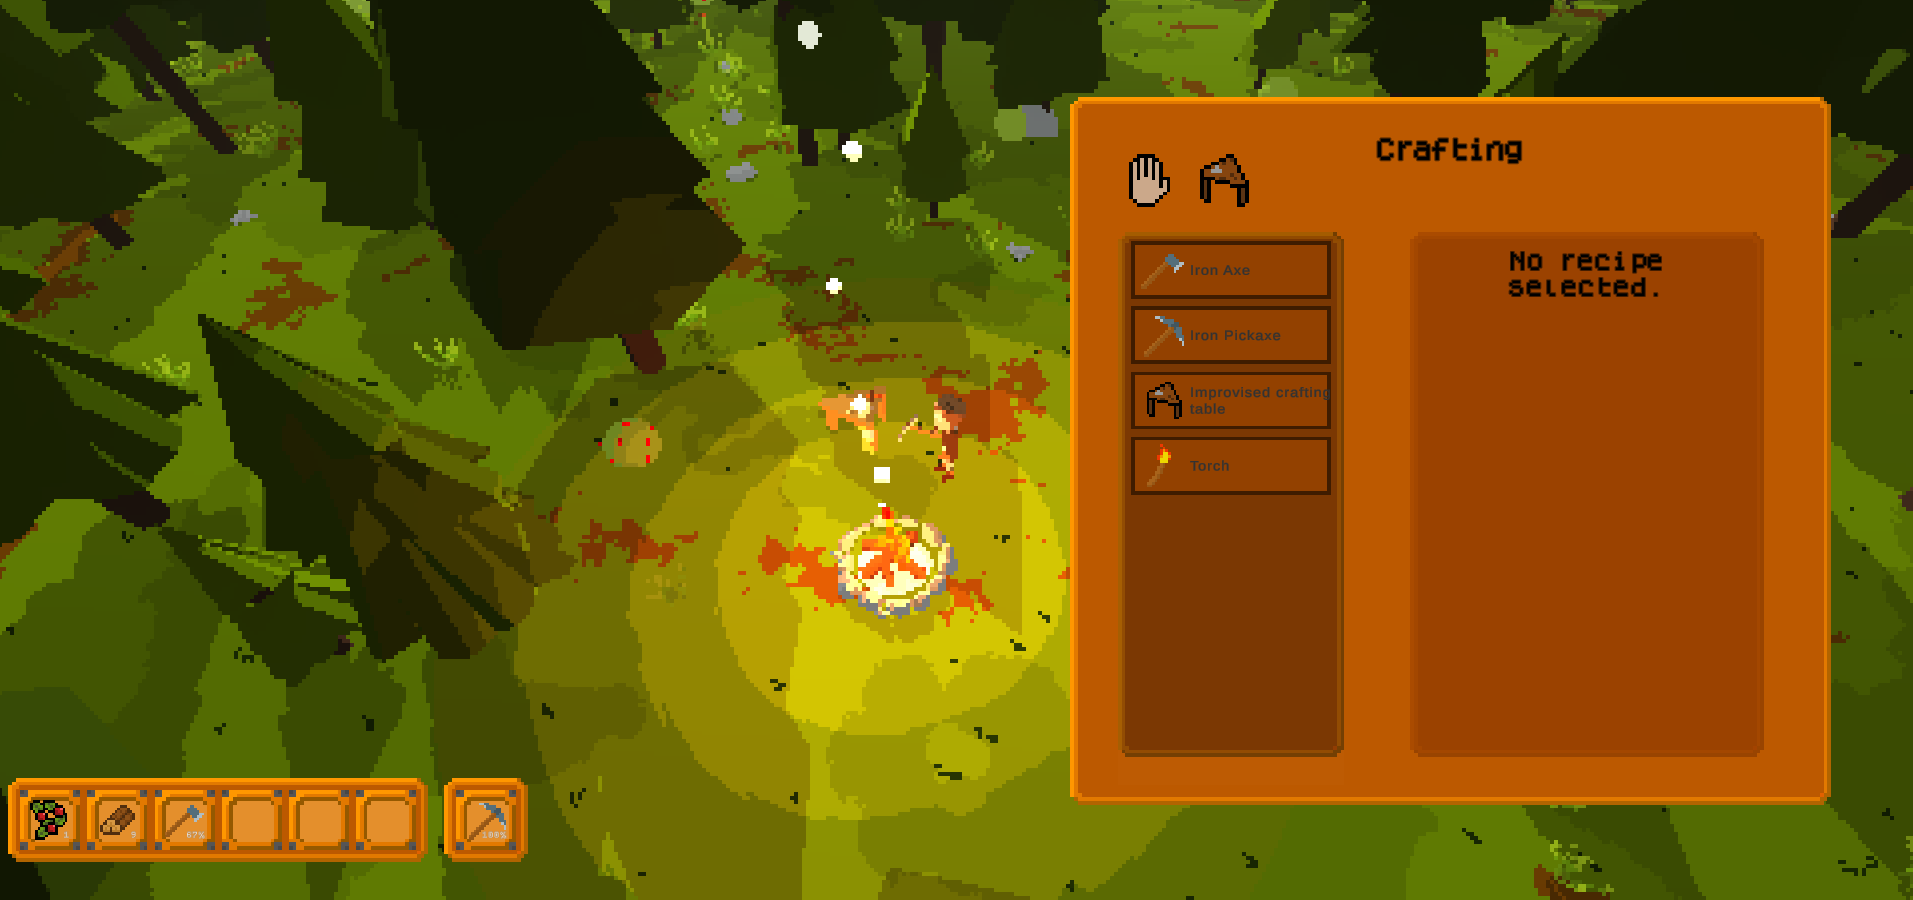
A player with the “tab” inventory open and the four basic craftings.
The first version was not published, for obvious reasons. The content was too low even for the lowest possible feedback; you could neither craft nor hit anything because you could not gather some basic materials. I created a Twitter account – which is now abandoned – and got my first few followers… probably all bots.
After that version, I took a pause of almost a year to focus on other things.
The player testing various sword items
Version v0.0.2 started some months later. See the next post for the new features added in v0.0.2!
Changelog:
V0.0.1 – “Genesis” [First prototype version, worldgen and player]
[ADDED] -Added basic procedural worldgen and world spawn animation. Basic menu and simple WASD player movement, run and jump. Added day and night cycle. Everything that’s in the game and is not mentioned in above versions has been done in this first version.